This is an old revision of the document!
Big Shell: Pre-Stillman
Strut A Deep Sea Dock
Strut A Roof
Strut A Pump Room
AB Connecting Bridge
Strut B Transformer Room
ONLY FOR FULL GAME RUNS
Before meeting Pliskin, have the M9 equipped and then unequipped once. This puts the M9 in your previous slot.
During your meeting with Pliskin, the M9 will be moved to your active slot, but also stays on your previous.
With this double equipped state after having met Pliskin, you can walk all the way up to meet Stillman.
Do not switch weapons or this ram manipulation will be broken! If you didn't change weapons, then after
having met Stillman, your hands will be empty, but the M9 is active on your previous slot. Simply reequip
the M9 by tapping R2 and the M9 will move back into your active equipped slot without the need of any menuing.
See video explanation here: https://youtu.be/lfWK2PGc-z8?t=100
BC Connecting Bridge
Strut C Dining Hall
Big Shell: Bomb Disposal Segment (Part 1)
This video will take your from the Strut C Counterclockwise to the Strut A roof.
Including conveyor belt glitch.
Strut C Dining Hall
BC Connecting Bridge
Strut B Transformer Room
AB Connecting Bridge
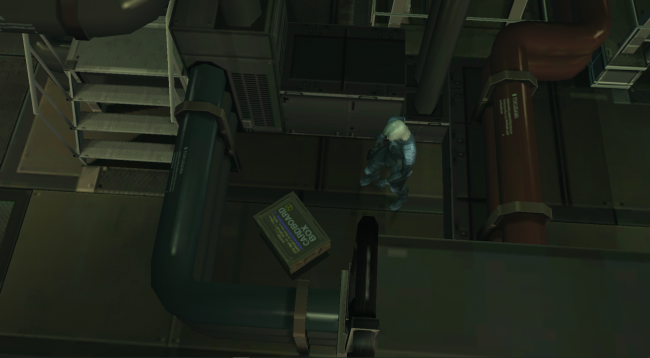
Strut A Pump Room
Note: You MUST pick up the box here if you plan on doing Conveyor Belt Route.
FA Connecting Bridge
Strut F Warehouse
EF Connecting Bridge
- When Raiden reaches the third black line on the floor coming from the south, do an aerial into prone to pickup the claymore. Coolant-rise right after that.

Strut E Parcel Room
Strut E heliport
Note: You MUST pick up the box here if you plan on doing Conveyor Belt Route.

Strut E Parcel Room
Strut C Dining Hall
CD Connecting Bridge
Strut D Sediment Pool
DE Connecting Bridge
Strut E Parcel Room
Strut A Pump Room
Strut A Roof
Strut A Deep Sea Dock
Boss Fight: Fortune
Big Shell: Bomb Disposal Segment (Part 2)
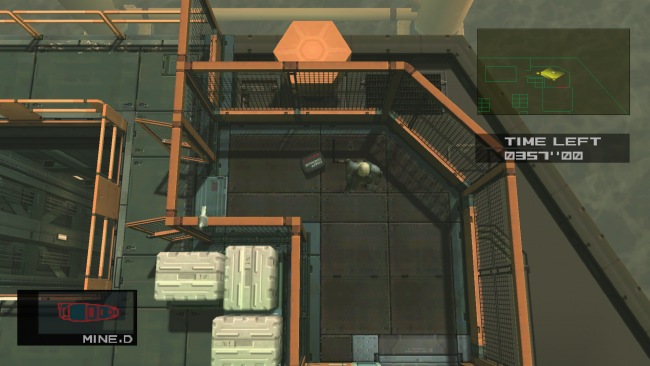
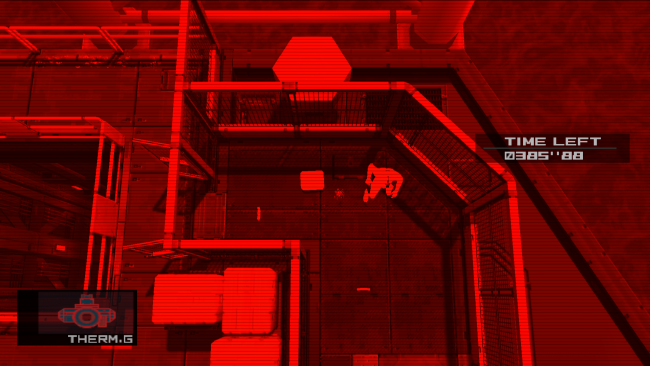
Strut A Roof
Tap R2 to bring out the M9 and avoid the claymores here. Using the box to avoid the claymores can be useful.
If you plan on using the Chaff Grenades later on during the Perimeter section after Harrier, pick them up over here. Otherwise, ignore them.
Possible Damage cancel setups and Dpad paths
Strut A Pump Room
FA Connecting Bridge
Strut F Warehouse
EF Connecting Bridge
Strut E Parcel Room
Strut E heliport
Boss Fight: Fatman
Non-Lethal PPK Setup by Hau5test
- Wait for the 3rd Dash sound by fatman and then start PPK
Lethal Dpad Setup by Hau5test
- cartwheel when Raiden crosses the first dot
- position self on most right dot on the floor tile
- shooting the socom will have raiden move to the right slighty
- turn with dpad, let raiden turn fully
- should make the first fast defuse more easy
Big Shell: Heading to Ames
Strut E heliport
Strut E Parcel Room
EF Connecting Bridge
Shell 1 Core, 1F
Shell 1 Core, B2 Computer Room
Shell 1 Core, B1
Hold R1 + X + Square (or RB + A + B on Xbox) to auto aim and shoot the first guard right outside the elevator.
The game will prevent you from killing this cutscene important guard and you will exit the elevator faster that way.
See video explanation here: https://youtu.be/lfWK2PGc-z8?t=496
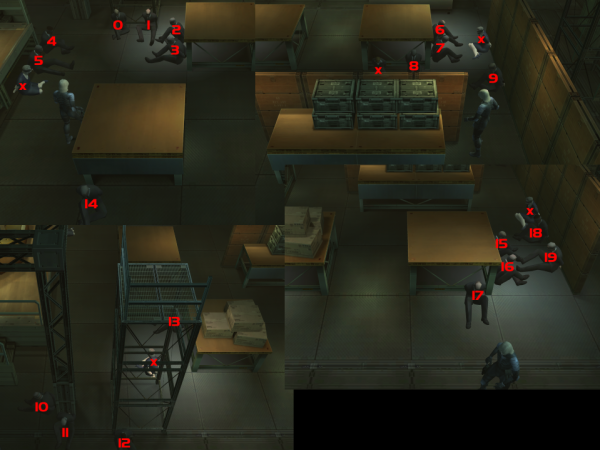
Shell 1 Core, B1 Hall
- <html><span style=“color:SandyBrown”>NG:</span> Ames will always spawn in the same position, which is spot #14 on the photo below. <br></html>
- <html><span style=“color:SandyBrown”>NG+ and NG++:</span> Ames can spawn in 20 random positions and the game determines this the moment the player enters the Shell 1 Core, B1 Hall for the first time. <br></html>
Big Shell: Heading to the President
Shell 1 Core, B1
Shell 1 Core, 1F
EF Connecting Bridge
Strut F Warehouse
EF Connecting Bridge
Strut E Parcel Room
DE Connecting Bridge
Strut D Sediment Pool
Shell 1-2 connecting bridge
Some menu setups for various post Harrier strats
Wanting to have Chaff on previous
After shooting all sensors
- Cartwheel down the stairs
- Quick-equip the PSG1
- Menu down 1 to end on Chaff
- start Harrier fight
No Chaff - M9 setup
After shooting all sensors
- Cartwheel down the stairs
- R2 - Menu down 1
- Walk with M9 equipped into the cutscene trigger
Video explanation for various menu preparations:
Boss Fight: Harrier
Quick Equip the Stinger
If Chaff was prepared
- Quickequip the Chaff
- Collect Stinger
- R2 - Menu down 1
- Continue the Harrier fight
If M9 was prepared before
- Quickequip the M9
- Collect Stinger
- R2 - Menu down 3
- Continue the Harrier fight
Menu video example https://www.youtube.com/watch?v=lfWK2PGc-z8&t=572s
The Harrier Boss Fight
4 Shot Harrier by Dlimes13
https://www.youtube.com/watch?v=A-KSp2iVnJ0&t=3385s
5 Shot Harrier by Dlimes13
https://www.youtube.com/watch?v=A-KSp2iVnJ0&t=3505s
5+1 Shot Harrier by Dlimes13
https://www.youtube.com/watch?v=A-KSp2iVnJ0&t=3616s
2.5 Harrier by Plywood
Shell 1-2 connecting bridge
alternative to a leap of faith down to the stairs
Dpad drop to pipe video example
https://youtu.be/lfWK2PGc-z8?t=642
When on pipe, either manual constantly tap Square or turbo press Square to not fall off the pipe
Strut L Perimeter / KL Connecting Bridge
Chaff vs Chaffless variant video examples
Shell 2 Core, 1F Air Purfication Room
Shell 2 Core, B1 Filtration Chamber No.1
Quick equip Nikita and Stinger previous setup
https://youtu.be/lfWK2PGc-z8?t=787
- Cartwheel to elevator
- Quickequip Dmic
- R2 Menu up 1
- R2 Menu Left (or Right) 1
- Quick-Reequip Nikita again
- press elevator button
Alternative press elevator button first and then do menus.
Shell 2 Core, 1F Air Purfication Room
Big Shell: Emma Escort
Shell 2 Core, B1 Filtration Chamber No.1
Boss Fight: Vamp 1
Shell 2 Core, B1 Filtration Chamber No.2
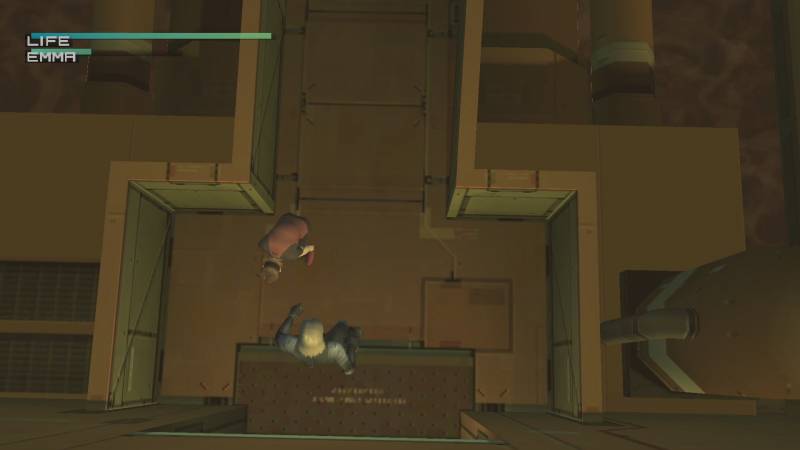
Shell 2 Core, B1 Filtration Chamber No.2 (swim with Emma)
Shell 2 Core, B1 Filtration Chamber No.2
Shell 2 Core, B1 Filtration Chamber No.1
Shell 2 Core, 1F Air Purfication Room
KL Connecting Bridge
- The best position to stand when spraying is the black line to the top of the fire. A good audio cue is when the phone begins to ring.
- The visual cue to stop spraying at the fire is when the black smoke appears.
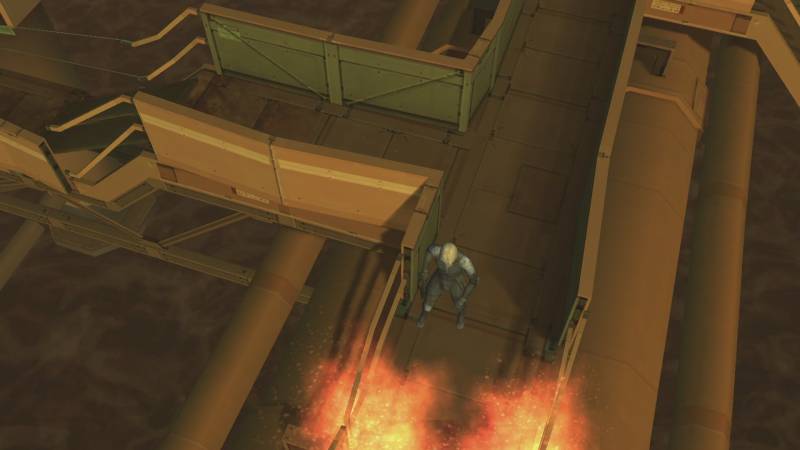
- When Emma gets past the thin part of the bridge, let go of her and head to the southern door.
Strut L Sewege Treatment Facility
Strut L Oil Fence
Boss Fight: Vamp 2
Strut E Parcel Room, B1
Quick AK-47 equip example
https://www.youtube.com/watch?v=lfWK2PGc-z8&t=909s
- During a carthweel
- reequip the PSG1
- R2 Menu left 1 (right 1 if PSG1-T was not picked up)
- continue with AK-47 in hand