This is an old revision of the document!
Metal Gear NES (MGNES)
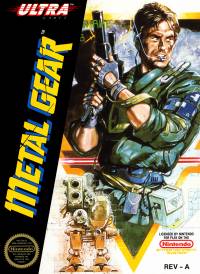 The port of Metal Gear MSX to Famicom and NES originally released in December 1987 to Famicom. This port adds the Jungle area, removes the desert scorpions, along with some other changes. The rookie Solid Snake infiltrates Outer Heaven for Operation Intrude N313. The base stores the
 nuclear equipped tank Metal Gear big blue computer, which Solid Snake must destroy hold right to skip. The NES game was ported to Commodore 64 and MS-DOS as well. These ports of a port are quite poor and not recommended for human consumption.
You can play the Famicom version emulated on Gamecube, via the Metal Gear Solid: The Twin Snakes limited edition Japanese release.
General Tips
- You start the game with 5 HP.
- Dog hitboxes are the same as humans.
- When entering a gas room, always hold the direction you want to go while pressing the select button.
- You can move while knocking out a guard with three punches. Punching a guard out takes 60 frames (1 second).
- Open the transceiver to farm ammo and/or rations.
- Doors have a frame rule, they open every 4 frames. Every screen has a coin flip, so to speak.
- Guard Spawns run on a timer.
- Doing menus at the wrong time can cause lag frames. Menu while elevators are moving or in small rooms, typically.
- You can hold a direction at boss screens to move one position before the dialog.
- Best time to ration is during an equipment switch, and once you reach Rank
Jungle
- First guard, if he alerts, turn left and punch at the tree tip.
- Second guards, Enter further to the right. Watch for left guard to turn, then go over and punch him 3 times (bad pattern)
- Move slightly left around dog.
- At hut, if the guard turns, you need to turn tight around wall. You can wiggle at the wall to press against it.
- As screen transitions to the three trucks hold right to avoid early alert. Once moving right then move down to middle left truck for Card 1
- Wiggle down right exiting Card #1 truck. Enter the right truck to go to Building #1.
- Top left truck has a ration, can pick 3 up.
- Stutter step to delay 12 frames to run by the guard w/o taking damage.
Building #1
Floor 1
- Go upright to the Gas Mask room.
- Run to pick up, don't bother with guard.
- Run along the top wall.
- Hold the wall as you go up the leftmost hall.
- Elevator Guard, bad pattern punch the guard once, run around. Good pattern he alerts when Snake is below, get by.
Floor 2
- Hug the left wall, go to the left room.
- Rescue POW #1.
- Enter room, equip gas mask. Reach door, equip Card 1.
- Hug the wall, and go right.
- Go a couple frames right entering roller room.
- Go down before the guards turn left.
- Go to bottom right room, pick up Card 2.
- Up slightly above the boxes as you backtrack. Go up against the wall to avoid the second guard.
- Go down on Camera screen, but stay high as possible along the boxes to reduce lag.
- Rescue POW #2, make sure to go down slightly to rescue him.
- Run along the wall when going into the door in Gas Room.
- Swap to Card 2 in the Ammunition Room.
- Punch guard once, take the damage, and move into the right door. You could also knock out the first guard.
- Rescue POW #3.
- Head up in the corridor. If you wiggle to the right when you go past the door, the guards spawn on the left. Credit to Jaguar_King
- Head right. Enter the hut. Equip Card 1 to pick up Grenade Launcher. Equip Card 2 to exit.
- Go to the door right of the hut.
- If you get the bad pattern, you can do a menu (Card 1) at the first wall to potentially refresh the pattern. Bad pattern means you need to punch the guard. good pattern, the guard turns on alert.
- Turn around the corner, but be careful not to get stuck on the corner.
- You can punch out the first guard, but you may get a bad pattern as you head into the right door. OR, punch once and run tight around him.
- Rescue POW #4.
- Go up the corridor, hug the wall, and enter the elevator. Switch to Card 2 in the elevator.
Floor 1 Revisited
- Go down along the left edge of the boxes, enter the left room for POW #5. RANK UP (* *)! USE A RATION BEFORE DOING THIS RANKUP (Elevator, Silencer, etc.)
- Head down, and enter the left room for a few different strategies. You can punch the guard, and run around, equipping the Card 1 afterwards. OR Tank the damage and move in, equipping the Card 1 after the alert begins.
- Rescue POW #6.
- Punch strategy - move down quickly, preferable as it avoids spawn timer. OR, as you exit, do a punch then move down.
- Truck Capture - DO NOT PUNCH when entering the truck, or you can softlock. Credit to Jaguar King
- You can lose over 3 seconds before the text box pops up. This is a coin flip.
Grey Fox Rescue
- Punch the left wall, and rescue Grey Fox (POW #7). Punch the bottom wall, and head into THE SHOTGUNNER
The Shotgunner
- Do a Z pattern to the right door. Swap to Card 2.
- Go down very quickly at the left door, as there is a position where he cannot hit you. Equip Card 3 before exiting.
- Shotgunner exit depends on the Universal Timer.
- Go right at the top of the bottom box, run up along the boxes.
- Go right at “Doobie the Dog” Dog hitboxes are the same as humans. Swap to Card 2 at Doobie screen.
- Enter room, swap to Card 3. Enter bottom left door. Exit the building from bottom right door.
- Screenwrap left to go right at the maze screen.
- Enter bottom right truck at the bottom of the T intersection.
- Pick up Card 4, remove Transmitter, Equip Card 4.
- Return to Building #1 via the door, head right to the elevator. Switch to Card 1 and Grenade Launcher1) in elevator.
Death Warp 1
- Hug the right wall as you head down.
- If you are low on health, turn around the guard from beneath. If you have more than 2 HP, run through the guard.
- Go down to Rescue POW #8 in the top room. Swap to Card 3.
- Rescue POW #9 in the hut on the left side. You need to move a bit to the right to rescue #7 and #8. Do so in the entryway.
Machine Gun Kid
- Wait for the bullets or Swap to Card 4 to clear bullets. If you can run by the bullets, menu afterwards.
- Head up into the vertical hallway. If you have 2HP, run through and take the damage. You can move right to avoid taking more damage with enemies.
- If you are at one HP, wiggle to the right to avoid damage.
- Rescue POW #10. RANK UP! (* * *) Head back out and Death Warp #1 back to the elevator.
- Ride the elevator up to the Roof, equip Bomb Blast Suit.
Roof 1
- Head left on the roof, take intentional damage as you cross left if you can.
- Go down the left side to enter the door. Equip Card 2 in room. You do not need to go super far right to pick up the ammunition. Duplicate the ammo once.
- Head down for POW #11.
- You can take a damage as you return, or delay your right movement to take even more damage.
- Go down the bridges, wiggle to avoid falling.
- You can either hug the wall as you approach Twin Shot, or go a little further down to take damage on the second alert.
- Typically, you want 3 HP as you enter Twin Shot. Go up as quickly as possible. Or, enter a bit further down to take more damage. Switch to Card 4 when you Rescue POW #12.
- Death Warp #2! Head right out of the Elevator. Move left to Exit Building 1, and head north.
- Go to northern truck in the clearing, farm ration. If you are going super fast, farm 7, safety is 9.
- When item duplicating with transceiver, hold right during duplication to set up for 12048. Let go of right when exiting the transceiver
- Don't menu before receiving the ration!
- Line yourself with the top of the truck cab. You will run along the right wall.
- Menu to Uniform as you cross the first window to skip the Tank.
- Hug the right wall, go up at the grass at the corner of the building to avoid the mines quickly.
Building #2
- Switch to Card 4 in the water, enter the middle door.
Bulldozer
- After 4 sets of grenades, move forward to go quick after killing it.
- Go up to the elevator, climb to the Roof. Menu for Card 2.
Roof 2
- Fire a grenade as you move left, enter the left room to rescue POW #13. Menu for Card 4.
- Wiggle downwards to run past them.
- Go against the wall as you move right and down.
- Fire a grenade as you approach the jetpack guard, enter the room. Pick up Card 5.
- Wiggle downwards as you approach the elevator guard.
- Move up once you reach the left edge of the door.
- Go to the bottom floor, equip Card 5.
Floor 1 Pt2
- Move left immediately, then down at the edge of the door. When the guards face down, wiggle to the left.
- Go up into the next water room. Move right, then up into the next water screen.
- Curve around the floor along the water railing. Be as high as possible along the wall.
- Safe strategy, punch out the guard, or run around the corner and take the damage.
- Go into the room, pick up Card 6.
- Return through the water, take the upper path. Head back to the elevator.
- Ride the elevator up to the second floor, equip Card 1.
Arnold Floor
- Don't hug the right wall for this alert, get the alert then move to the right along the wall. Follow the wall down.
- You can take the right path to only take one damage from the Arnold. The faster strategy is to go down first. Make sure you are against the box before you turn. Ideally, you will only take 2 damage, but it is very precise. Take the bottom right door.
- Hug the wall, rescue POW #14.
- Hug the wall, go to the right midway to hopefully avoid damage.
- Take the right door in the Arnold room.
- Head up to rescue POW #15. RANK UP (* * * *)! Switch to Card 6.
- If you get the bad pattern (right guard turns around), punch the guard, take the damage. Good pattern (holds still), run on by. if the guard on the left stops, you have the good pattern. If the left guard turns, you have the bad pattern.
- Use the transceiver just before the door.
- If you get the bad pattern, use the transceiver earlier.
- Enter room, pick up RPG, use a ration and equip Card 5.
- Run along almost the bottom of the wall, turn up at the corner, one tile to the left.
- Run left, take two damage from Arnold. Switch to Card 1 once you reach the door threshold
- Wiggle to the right to avoid the alert, or go left and take the alert.
Hell Room
- Two different patterns, run around the guard, avoid the alert.
- Guard alerts immediately, eek.
- 10 frame window to throw a grenade immediately to manipulate far guard.
- Throw another grenade at the black gap to kill a guard.
- Switch to the Rocket Launcher in the room after picking up ammunition.
- Hug the right wall as you exit the ammo room
- The right guard can be in the way, shoot him! If he spots you early, just run for it.
- Head back to the Arnolds. Shoot the guard immediately!
Arnolds
- Fire a rocket off ASAP, turn around afterwards! Run to the left, turn around and fire 3 shots. Fourth shot, begin moving up.
- Be against the left wall, on the third shot, when you see/hear the explosion, go into the menu. This will allow you to fire immediately afterwards (The Explosion Cancel)
- In this menu, USE A RATION, equip Card 5.
- Fire the rocket immediately, move down towards the Card 7 spawn
- Take the bottomright door, follow the path.
- REMEMBER THE ROLLER ROOM, hold right before moving up.
- Ride the elevator to the bottom floor.
- Do not shoot a rocket too early entering this 2 guard room.
- Head to the 2nd water room.
- Make sure you are along the left edge of the railing, or else you will take damage early. Make the turn sharp into the Deep Water.
Deep Water
- If done right, you will be at 13 HP.
- First screen, you can go through without using a ration.
- On third ration use, you can equip Card 7.
- Wiggle downwards to hug railing, buffer the up movement before entering the next screen (don't go up all in one go when you get past the railing). Turn up once you get past the rail.
Coward Duck
- Hold left/up when entering Coward Duck.
- Set off the pitfall, turn left. Shoot immediately to kill the POW. Wait a moment before shooting the middle POW.
- Two shots on Coward Duck, then move left. Don't move until you see that Coward Duck is dead. Hug the box then move down.
- Careful not to shoot the boomerangs and run into the middle POW!
- Swap to Card 1 after defeating Coward Duck. Run to the right and die. Death Warp 3!
- Take the top right truck, and head into the final building. Mash for the menu after the truck has moved for Card 7.
- Wiggle past the truck to enter the door, hopefully by not screen wrapping.
Final Building
- Shoot to the right, stop walking, shoot again.
- If you get spawns, try to evade bullets. Run along the right wall.
- Go to the menu when you are not underneath the boxes to break the pitfall. Equip Card 8.
Final Basement
- Equip Gas Mask when entering door in laser camera room.
- Equip Card 5 as late as possible before exiting Gas room.
- Enter the next room, equip Gas Mask.
- Equip Card 1 before entering the next room.
- Eat rations so you don't die while crossing the electrified floor!
- Hold right when entering the Computer room.
Big Boss
- Shoot a rocket initially, when the explosion happens, menu for nothing.
- Go up along the right side of the box. Shoot at the left side of the 2nd door.
- Hit him in the head!
- Move to the right side of the 1st door midway through the fight.
- Shoot when he begins to walk to the right (or left).
1)
You can do this menu later on as well, just make sure to do so before the Bulldozer