Difficulty Differences
Enemy range of vision

From right to left: Very Easy, Easy, Normal and Hard/Extreme.

The enemy range of vision is very long on E-Extreme.

From right to left: Very Easy, Easy, Normal, Hard/Extreme and E-Extreme.
Note that in some areas the enemy range of vision is the same on all difficulties.
Health values
| Difficulty | Very Easy | Easy | Normal | Hard | Extreme | E-Extreme |
|---|---|---|---|---|---|---|
| Health | 200 | 120 | 100 | 75 | 50 | 30 |
- On Very Easy, rations are a full heal
- On other difficulties, rations heal half of max health (37 points on Hard)
- E-Extreme has no rations at all
General damage table:
- Guard Shot: 10
- Guard Melee: 5
- Explosion (Further): 20
- Explosion (Closer) / Shotgun: 40
- Bleeding: 1 / 3s at 1/3 health (rounded down if necessary)
- Smoking: 1 / s
- Choking: 1 / 0.25s
- Chaff/Stun explodes in player's hand: 10
Damage dealt by bosses often varies by difficulty.
Weapon & item capacity
| Weapon/Item | Very Easy | Easy | Normal | Hard | Extreme/EE | Pickup |
|---|---|---|---|---|---|---|
| M9 | 106 | 61 | 46 | 46 | 46 | +15 |
| USP | 61 | 46 | 46 | 31 | 16 | +15 |
| Socom | 121 | 73 | 61 | 61 | 37 | +12 |
| M4/AK-74u | 301 | 241 | 211 | 151 | 91 | +30 |
| PSG1(-T) | 101 | 81 | 61 | 41 | 41 | +20(+10/+5) |
| RGB6 | 60 | 42 | 30 | 24 | 18 | +6 |
| Stinger/Nikita | 100 | 50 | 40 | 30 | 20 | +10 |
| Grenades | 50 | 30 | 20 | 10 | 6 | +2 |
| Magazine | 200 | 150 | 100 | 50 | 10 | +1 |
| Claymore/C4 | 16 | 16 | 16 | 16 | 12 | +4* |
| Book | 10 | 8 | 5 | 5 | 3 | +1 |
| Rations | 10 | 6 | 5 | 3 | 2(/0) | +1 |
| Pentazemin | 20 | 15 | 10 | 5 | 5 | +5 |
| Bandage | 10 | 10 | 10 | 5 | 3 | +1 |
*Planted claymores picked from the ground give +1
Guard strength
| Difficulty | Very Easy | Easy | Normal | Hard | Extreme | E-Extreme |
|---|---|---|---|---|---|---|
| Health | 3000 | 3000 | 3000 | 4000 | 6000 | 10000 |
| Stun stamina | 3 | 7 | 9 | 14 | 19 | 24 |
| Sleep time | 9 min | 9 min | 5 min | 3 min | 3 min | 40s |
- The tengus fought in Arsenal Gear have 3000 health on all difficulties.
Lethal damage table:
- Torso shot on any guard / limb shot on attack team guard or tengu: 1000
- Limb shot on regular guard: 500
- Explosion: 3000 (6000 in VR/alt missions)
- Lethal HF Blade: 1500 (note that a single attack can hit several times)
Enemy armor mechanics:
- Regular attack team guards have body armor with 1280 health that protects from lethal bullet-based weapons.
- Each shot to this armor deals 256 damage.
- On Very Easy, the armor offers no protection.
Stun stamina damage table:
- Punch: 1
- Choke: 1
- Kick (including Raiden's double kicks combined): 4
- 2nd punch w/ weapon equipped: 2
- Roll: 3
- Throw: 5
- Rifle punch: 3
- Nikita punch: 10
- Non-lethal HF Blade: 6
- Close to stun grenade explosion during Guard Rush and Tengu fights: 3 (outside of these fights it is an instant KO)
Stun mechanics:
- For a guard to get knocked out, they either need their stun stamina to be reduced to -1 or have it reduced to 0 while getting knocked down or choked.
- On Very Easy and Easy, guards stay knocked out for 60s.
- On Normal and harder, guards stay knocked out for 30s.
- A punch to the head with a weapon or a punch to the crotch is an instant KO.
Tranquilizer mechanics:
- Guards have 3000 tranq stamina on all difficulties.
- A tranq to the torso will deal 1000 tranq damage.
- A tranq to a limb will deal 500 tranq damage.
- On Very Easy, a single tranq will immediately put a guard to sleep.
- On Easy, every tranq to a limb and the torso will deal 3 and 6 tranq damage respectively each frame (=180/s and 360/s).
- On higher difficulties, they deal 2 and 4 tranq damage respectively every frame (=120/s and 240/s).
Guard sleep/KO time reduction table:
- Attacking: 30s
- Drag and drop: 20s
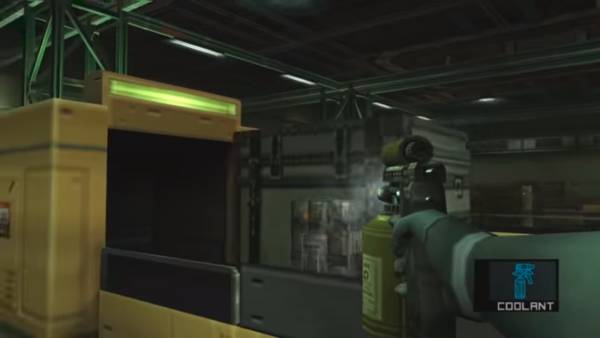
- Coolant spray: 100 frames every other frame = 50s every second
Note that time in MGS2 is based on frames, meaning 1s = 60 frames.
Bosses
Olga
| Difficulty | Very Easy | Easy | Normal | Hard | (E-)Extreme | Snake Tales |
|---|---|---|---|---|---|---|
| Attack - USP | 5 | 5 | 8 | 15 | 30 | 45 |
| Headshot | 32 | 32 | 32 | 32 | 32 | 24 |
| Body shot | 24 | 20 | 20 | 20 | 25 | 15 |
- Olga has 128 health on all difficulties
- Olga cannot be auto-aimed on Extremes
- On Easy and Very Easy, she will bleed 4HP/s after a hit until 64HP.
- Meryl replaces Olga in Snake Tales
Fortune
- Her railgun deals 40 damage from Very Easy to Extreme
- On E-Extreme, it actually deals less: 27 damage
- She fires two shots at a time on Extremes
Fatman
| Difficulty | Very Easy | Easy | Normal | Hard | Extreme/EE |
|---|---|---|---|---|---|
| Health | 256 | 256 | 256 | 384 | 512 |
| Shots to trip | 3 | 4 | 4 | 5 | 6 |
| Max bombs active | 2 | 2 | 3 | 3 | 4(/5) |
| Max M9 Headshots | 5 | 4 | 3 | 2 | 2 |
| Difficulty | Very Easy | Others |
|---|---|---|
| Headshot | 60 | 40 |
| Body shot | 14 | 1 |
| Punch | 14 | 2 |
| Kick | 21 | 3 |
- Fatman's attacks (pistol/bumping) deal 5 damage from Very Easy to Hard
- On Extremes, his attacks deal 6 damage
- Also on Extremes, Fatman ambushes the player at his bombs much more actively.
- He deals double damage if he bumps into the player while spinning
- On Normal and below, first person shooting locks on to his head
- Fatman sometimes drops Socom ammo when knocked down on easier difficulties.
- Fatman's boss fight in Snake Tales in the same as on Hard, except first person locks on to his head and 3 M9 headshots are possible
Harrier
| Difficulty | Very Easy | Easy | Normal / Snake Tales | Hard | Extreme/EE |
|---|---|---|---|---|---|
| Health | 2250 | 3250 | 3500 | 4000 | 4750 |
| Vulcan cannon | 3 | 6 | 10 | 14 | 18 |
| Missile | 40 | 60 | 60 | 60 | 50 |
| Missile Barrage | 17 | 22 | 26 | 30 | 50 |
- The Stinger deals at base 175 damage to the Harrier regardless of difficulty
- On Extremes, the cluster bomb always leaves the player on 1 HP and on fire
- Also on Extremes, the vulcan cannon attack includes a missile
Vamp
| Difficulty | Very Easy | Easy | Normal / Snake Tales | Hard | Extreme/EE |
|---|---|---|---|---|---|
| Knife throw | 5 | 10 | 18 | 22 | 24 |
| Melee knife | 4 | 12 | 24 | 26 | 30 |
| Head wound shot | 48 | 40 | 32 | 24 | 16 |
| Headshot | 21 | 17 | 14 | 10 | 7 |
| Limb shot | 9 | 8 | 6 | 4 | 3 |
| Explosive | 24 | 20 | 14 | 12 | 8 |
| Explosive in water (Stamina) | 16 | 8 | 4 | 2 | 2 |
| Punch | 12 | 10 | 4 | 4 | 2 |
| Kick | 16 | 14 | 6 | 6 | 4 |
- Vamp has 128 HP on all difficulties
Vamp 2
| Difficulty | Very Easy | Easy | Normal | Hard | Extreme/EE |
|---|---|---|---|---|---|
| Head, tranq. | 20 | 20 | 10 | 8 | 8 |
| Body, tranq. | 10 | 10 | 7 | 6 | 6 |
| Head, lethal | 100 | 50 | 25 | 16 | 12 |
| Body, lethal | 20 | 10 | 10 | 8 | 7 |
- Vamp 2 has 100 HP on all difficulties
Tengus 2
| Difficulty | Very Easy | Easy | Normal | Hard | Extreme/EE |
|---|---|---|---|---|---|
| Tengus to defeat | 48 | 48 | 64 | 96 | 128 |
- Snake can take 15 hits during the first fight and the second on Normal and below
- On Hard and up, Snake can take 13 hits during the second Tengu fight
- On Very Easy, the player gets full ammo before the Tengu 1 fight.
Metal Gear RAYs
| Difficulty | Very Easy | Easy | Normal / Snake Tales | Hard | Extreme/EE |
|---|---|---|---|---|---|
| Total HP | 3072 | 5120 | 7168 | 10240 | 20480 |
| Difficulty | Very Easy | Other |
|---|---|---|
| Stinger (open mouth) | 1280 | 320 |
| Stinger (closed mouth) | 400 | 100 |
On all difficulties:
- A single RAY has 1024 HP
- A RAYs machine gun deals 16 damage (halved by Body Armour)
- Water cannon deals 24 damage
- A RAYs stomp deals at least 48 damage
Solidus
| Difficulty | Very Easy | Easy | Normal | Hard | Extreme/EE |
|---|---|---|---|---|---|
| Health | 75 | 100 | 100 | 95 | 95 |
| Katana | 5 | 7 | 7 | 8 | 7 |
| Strong slash | 20 | 24 | 24 | 26 | 12(/26) |
| Missile | 22 | 42 | 42 | 46 | 44 |
| Tentacle throw | 10 | 12 | 12 | 13 | 12 |
| HF Blade | 4+5+7 | 3+3+4 | 3+3+4 | 2+2+3 | 1+1+2 |
- Punches deal 1 damage to Solidus on all difficulties
- Kicks deal 2 on Normal and below, 1 on Hard or higher
- Solidus's tentacle sweep deals 1 damage on all difficulties
Bomb locations
Bottom of strut A
 Normal and below (The player goes to the south end of the room)
 Hard (The player goes to the space with the scuba gear by hanging)
 Extremes (On the west wall)
Added on Hard & Extreme
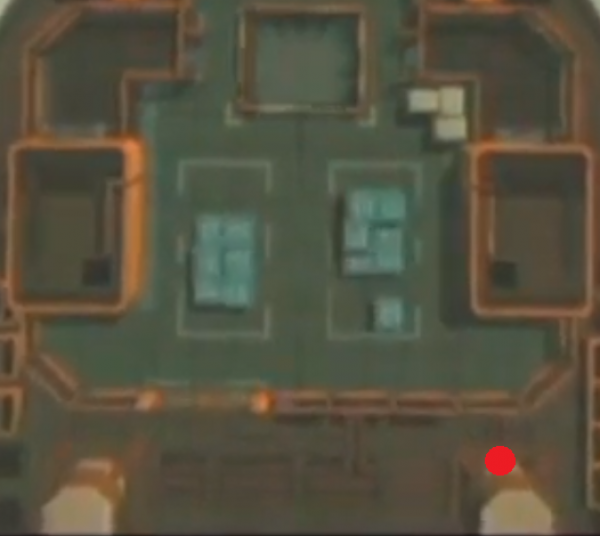 Roof of strut A. The red dot. Sprayed through the fence
 Strut E. Attached to the northern part (Extreme) or eastern part (Hard) of a moving box.
 Strut D. Under the hatch at the northern part of the room.
Extreme bombs
 Strut D. Eastern part of the room under the platform. NG and NG++
 Strut D. Northern part of the room under the platform. NG+
 On Hard and below, the strut F bomb is against the wall.
 On Extreme, the bomb is attached to a box making it possible to spray it from the ground.
Countdown timers
| Difficulty | VE/Easy | Normal | Hard | Extreme/EE |
|---|---|---|---|---|
| Deep Sea Dock Bomb | 400s | 400s | 300s | 200s |
| Heliport Bomb | 500s | 400s | 300s | 200s |
| Fatman's Initial Bombs | 60s | 47s | 47s | 47s |
| Emma Bleeding | 1200s/600s | 300s | 240s | 180s |
| Solidus's Torture* (~) | 10s | 15s | 20s | 25s/55s |
*In the HD version, Solidus's torture only lasts ~10-15s on all difficulties.
Hard & Extreme additions
- Enemies don't quit a hold up on their own from Very Easy to Normal. They do from Hard to European Extreme.
- Some cameras now rotate.
- Deck B Hatch no longer opens.
- On Extreme, the player cannot shoot the tarp or the lamp during the Olga fight.
- Strut B has cameras when it's entered after meeting Stillman.
- On Extreme, there are already ciphers on the EF connecting bridge when it's first entered.
- Strut E contains extra cameras.
- The president is sleeping and he has to be woken up with explosives.
Misc.
- On Very Easy, the player doesn't have to log on to a node for the radar.
- The M9 can be obtained at strut A on Very Easy and Easy.
- On Very Easy, alert/evasion/caution goes away after entering another room.
- Guards don't come to check the situation after the Harrier fight on Very Easy.
- The Nikita's locations varies slightly by difficulty.
- The time Snake appears to help Raiden during the sniping section varies by difficulty.
- On easier difficulties, the floor boards on the EF connecting bridge respawn for when Shell 1 is re-entered.
Ranks
The following table shows the maximum stats you could have for the top ranks from the difficulties Easy to European Extreme on Tanker-Plant only (Very Easy does NOT have a Rank 1). These were taken by bmn from the PC Port of Substance:
| Difficulty | Easy | Normal | Hard | Extreme | E-Extreme |
|---|---|---|---|---|---|
| Rank Name | Hound | Doberman | Fox | Big Boss | Big Boss |
| Time | 3:00:00 | 3:00:00 | 3:00:00 | 3:00:00 | 3:00:00 |
| Saves | 8 | 8 | 8 | 8 | 8 |
| Continue | 0 | 0 | 0 | 0 | 0 |
| Alerts | 3 | 3 | 3 | 3 | 3 |
| Kills | 0 | 0 | 0 | 0 | 0 |
| Rations | 0 | 0 | 0 | 0 | 0 |
| Special Items | Unused | Unused | Unused | Unused | Unused |
| Max damage taken (DMGA MMOUNT) | 1270 (~10.6 bars) | 1050 (10.5 bars) | 775 (~10.33 bars) | 500 (10 bars) | 280 (~9.33 bars) |
| Shots Fired | 700 | 700 | 700 | 700 | 700 |
| Radar | Off | Off | Off | Off | Off |