Table of Contents
Disc 1 Normal
General Info
- It is faster to roll upstairs then run up them1). This is situationally true when going downstairs. However, if you roll too early Snake will faceplant.
- Many of the options are personal preference. Switching Quick Change from unequip to previous is MANDATORY, or else it multiplies the amount of menus and ruins certain strategies. Turning radar off will save ~5 seconds from skipping a cutscene.
- Mash Start and/or B to skip cutscenes
- Double Tap A or Y to skip codecs
- Each Pentazem prevents hand trembling for 30 seconds, the effect stacks.
- In Game Time does not tick at the map screen, Start+B.
Docks
As of March 2023 it is almost a Minute and a Half faster to use the Prozac Skip (originally found in MGS2) to glitch through the elevator doors
All of the previous strats have been archived here: Old Glitchless Docks
- Mash B or Start to skip Snake standing up
- Open up the leftmost locker with Y to grab the M9.
- Careful not to get an alert here, as it will delay the elevator. Receiving a caution could delay the elevator if the caution doesn't end by the Development Supervisor credit Takashi Mizutani.
- Equip the M9 and deplete all of the ammo to generate a magazine for the Prozac Skip.
- The M9 has 16 rounds with a 15 round mag, deplete at least 15 rounds here to generate one magazine, you may shoot the last round to generate a 2nd magazine for the Darpa chief door, or do it later
- Fastest method is to hide behind the locker door and shoot in FPV and either lean left or lean right with the L and R triggers (depending on your position), leaning behind the locker door will cut off Snake's reloading animation
- If leaning left, alternate shooting and leaning, if leaning right, hold R and shoot simultaneously, and release simultaneously to cut off the reload animation
- Equip the magazine R ▼ and flatten Snake's back against the elevator doors, enter FPV, throw a magazine and turn during the throwing animation, release FPV when facing the elevator doors
- Fastest known strategy can be found below
- Don't forget to skip the cutscene as you enter the elevator, or the fadeout will take longer.
Helipad
- When running towards the vent guard, hold A+B to aim the M9. You need to do 3 M9 shots to knock him out. The third shot must be done while the camera is spotting you, or you will not skip the surveillance camera mini-cutscene. Tranquilizing the guard saves time from getting shot by him. Example clip
- After tranquilizing the guard or getting shot, roll into the vent. Begin mashing the right trigger. The ideal rate is 7 mashes per second.
Tank Hangar
- Continue mashing the right trigger as you follow the mice. As you exit the vent, go towards the cargo door. The guard will notice you2), allowing you to slip by and call the elevator.
- When using an elevator, enter it on the left side once the door is opened. In other words, follow the blue line. At max this saves 5 frames.

- Press down and A to go to B1.
Holding Cells
- Follow the hallway to the ladder, climb with Y.
- Right trigger mash your way to the DARPA Chief.
- It is faster by x frame to exit the Chief's cell by rolling compared to running down.
- Make sure to exit the cell with the M9 equipped.
- As of March 2023 using the Prozac Skip saves about 20 Seconds
- The timing on this door is less forgiving than the Dock Elevator
Guard Encounter
- Grab Socom, R ◄ or ► 1
- Fastest method to deal with the first wave is the lineup strategy. Example can be seen here. Dpad inputs are right, downleft, stop at the corner. Shoot front guard, then back guard, and press B to lock on to final guard.
- After killing the first wave, run immediately to the locker. Open it up and grab the SOCOM ammo.
- Meryl may help with the second wave. Kill the middle guard first, then left, then right. Utilize the B button lockon to quickly swap between target.
- Move to the left edge of the door, and aim in first person towards the elevator. The earlier you kill, the faster the guards will respawn.
- After 6 guards, move to pick up any SOCOM ammo on the floor. Then reposition yourself in the bottom left corner by the door.
- Kill the grenadier and the final two guards.
- After the cutscenes, move up and slightly to the right to call the elevator.
- Press down to go to B2.
Armory
- Go to the middle room to pick up 3 or 4 C4.
- Equip C4. From M9 R ▼ 1 (if magazine, throw it away then R ▼ 1 again from M9)
- There are different positions to place the C4. The fastest position blasts you into the loading zone. The easiest thing to do is place the C4 near the wall, lean against the wall, then blow it up.

Armory South
- Blow up the first wall. Position the C4 by the girder.
- After you position the second C4, make sure to quick change to M9 before blowing up the wall. This will save a menu during Revolver Ocelot.
Revolver Ocelot
- Easiest fight in the game, but there are a few approaches to aiming here.
- After quick changing to M9, go into FPV. From here, you can either shift your weight to the left with Left Trigger, or stand still. Standing still requires you to aim the first shot through the gap in the column.
- Aim for the head, time out the invincibility frames.
- To dodge Ocelot's bullets, either duck in FPV with X, or shift your weight.
- Be careful when Ocelot shifts his own weight to shoot at you.
- After the cutscenes finish, you have two optimal opportunities to call Meryl. Make sure to hold Start + A to use the codec.
- After the cutscenes finish in Armory South
- As you enter the Armory
- Scroll left until you are at 140.15. After seeing 140.2X, wait about half a second then release left.
- Pick up the SOCOM ammo in the top right corner of Armory South.
- Do not roll through the exit door.
Armory Continued
- You may go into the room directly next to you to pick up SOCOM ammo.
- Head towards the elevator and call it.
- Press down to go to 1F.
Tank Hangar Lasers
- DO NOT hold Start+A after the load, wait until you see the elevator panel.
- There are several different approaches to the lasers. They will be listed out in order of slowest to fastest.
- When leaving the elevator, you can hold the gun up to prevent accidentally hitting the elevator panel when holding downright
- Go into the room to the right of the lasers, pick up the SOCOM suppressor, and shoot out all of the sensors on the left wall.
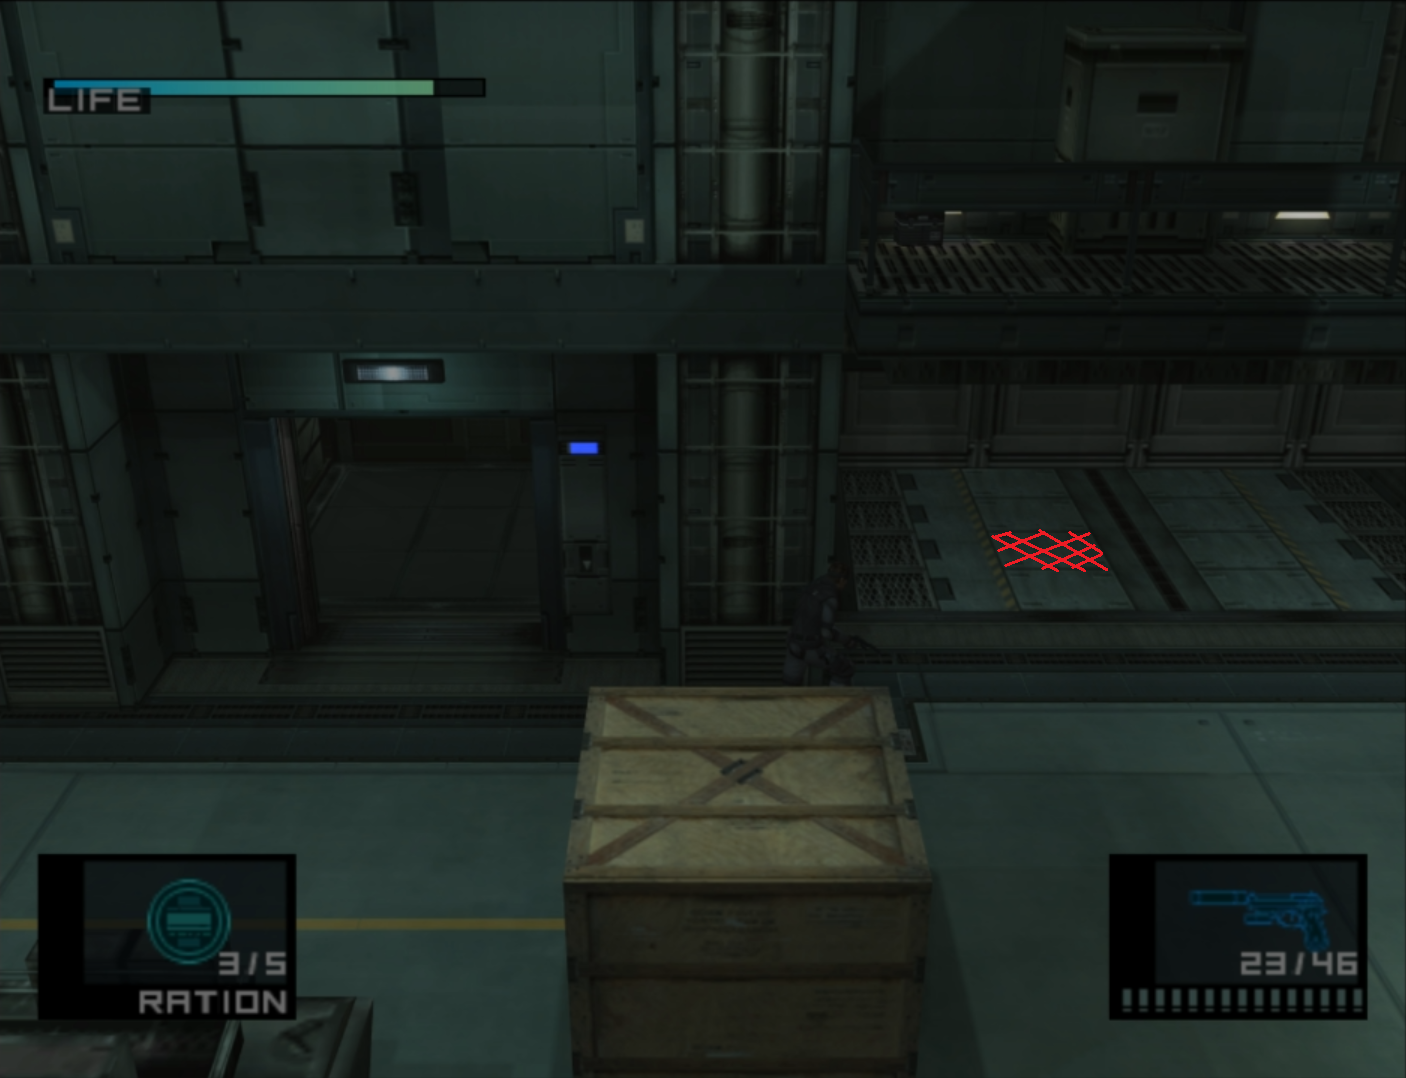
- Pull out the cigarettes or shoot the fire extinguisher with the M9. Dodge the lasers until you get to the third set, then SOCOM the rest of the sensors. Or, continue to dodge the lasers.
- After skipping the Cargo Door cutscene and the door beep, exit the elevator. Between the first two lines in the floor in the laser hallway, roll forward. Stand up. If you rolled too early, you will need to crawl a bit to avoid the 2nd laser. Swap to SOCOM. SOCOM the remaining sensors from farthest to closest. Roll towards the door. Recommended for novice players.
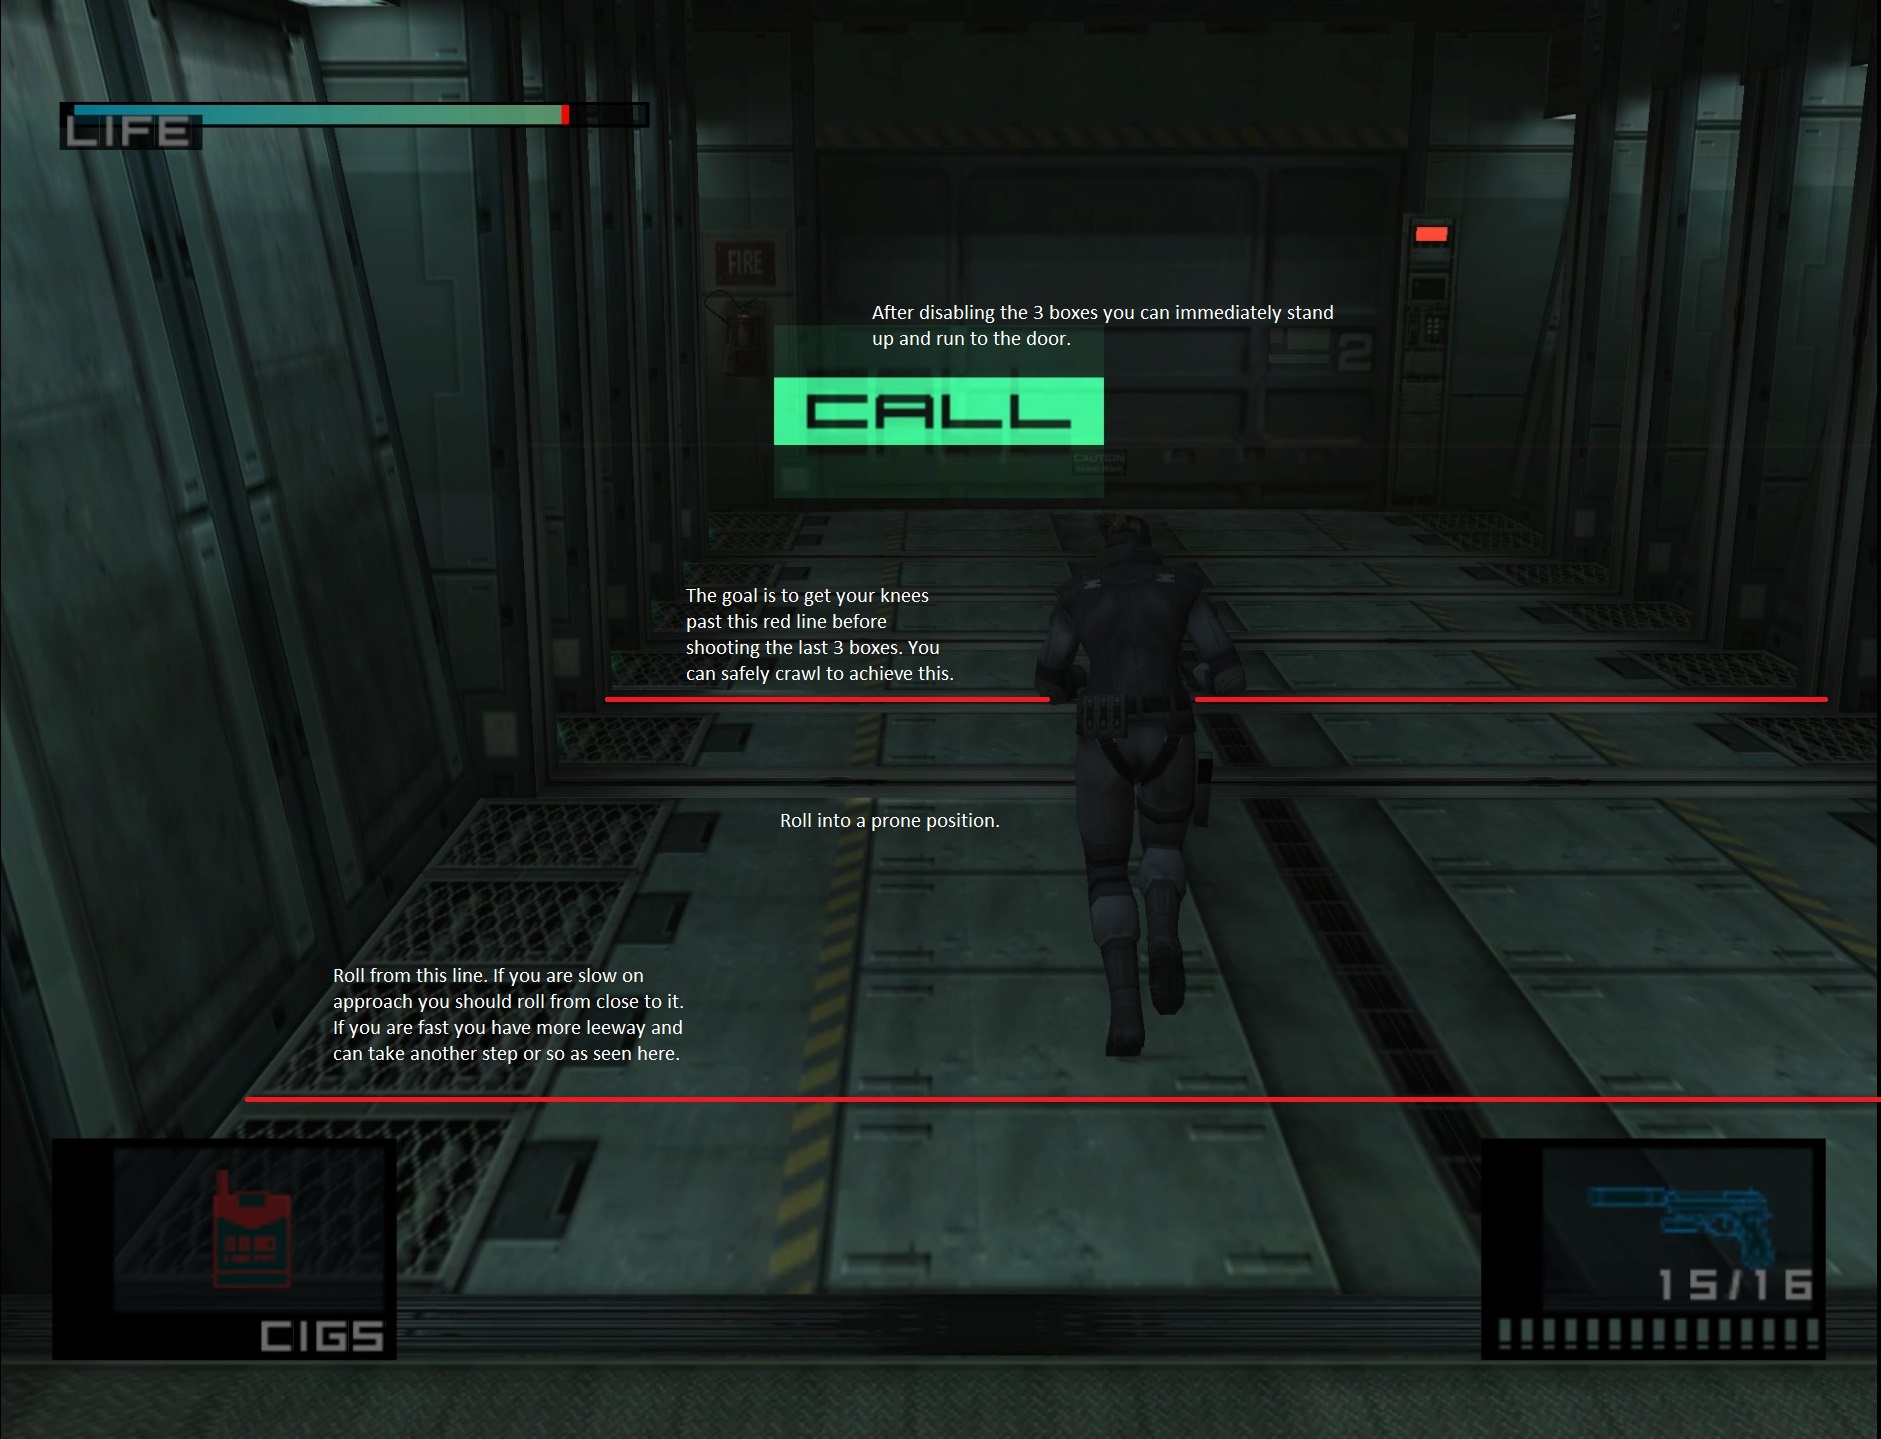
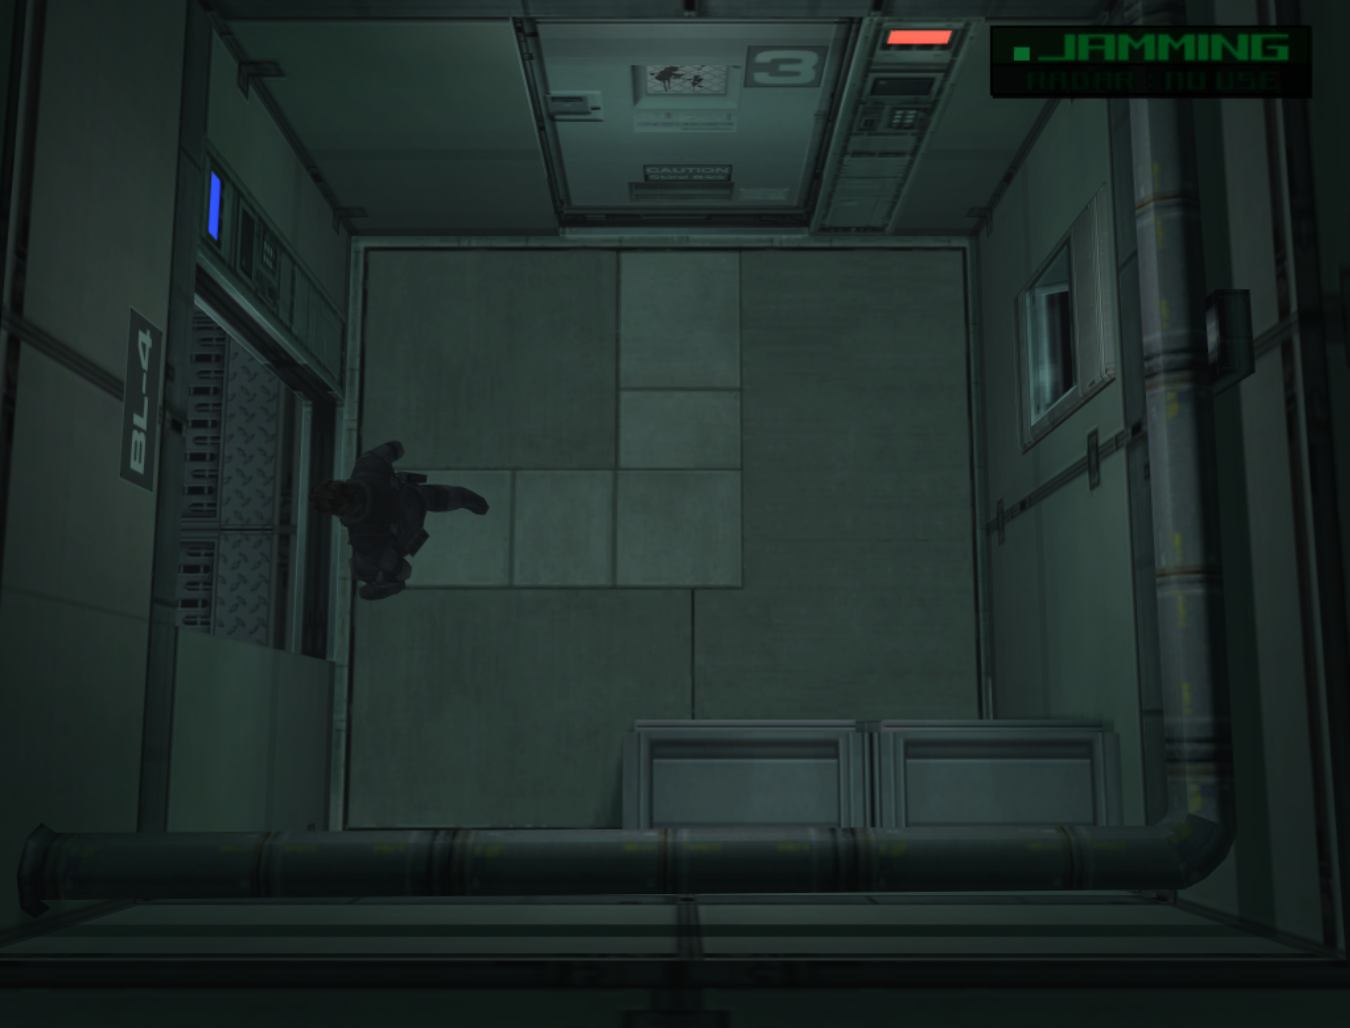
- During the Meryl codec, hold ~ 2:30 - 2:45 on the Analog stick. Skip the Cargo Door cutscene. After getting off the elevator panel, hold down right and hug the wall. Turn the corner immediately and run forward. Roll at the line shown in the screenshot. You can roll earlier, but not by much. If you roll too early or late, you will get caught. Mash right trigger to crawl faster. Enter the door while in a crawl. Recommended for advanced players.

- Newest YOLO roll developed by Wallguy, which can be faster and has an easier visual cue
- Immediately after mashing start to skip the cut scene: HOLD down+right on the dpad - B+A in order to move without waiting for the camera to readjust itself.
Canyon
- Hold right to pick up the Chaff grenades. Move up and roll at the position shown in the screen shot to save frames. If you haven't swapped to SOCOM, now is the time to do it. M9 equipped, R ◄ or ► 1 for Socom

M1 Tank
- New faster and more consistent Tank Strategy, recommended for lethal tank
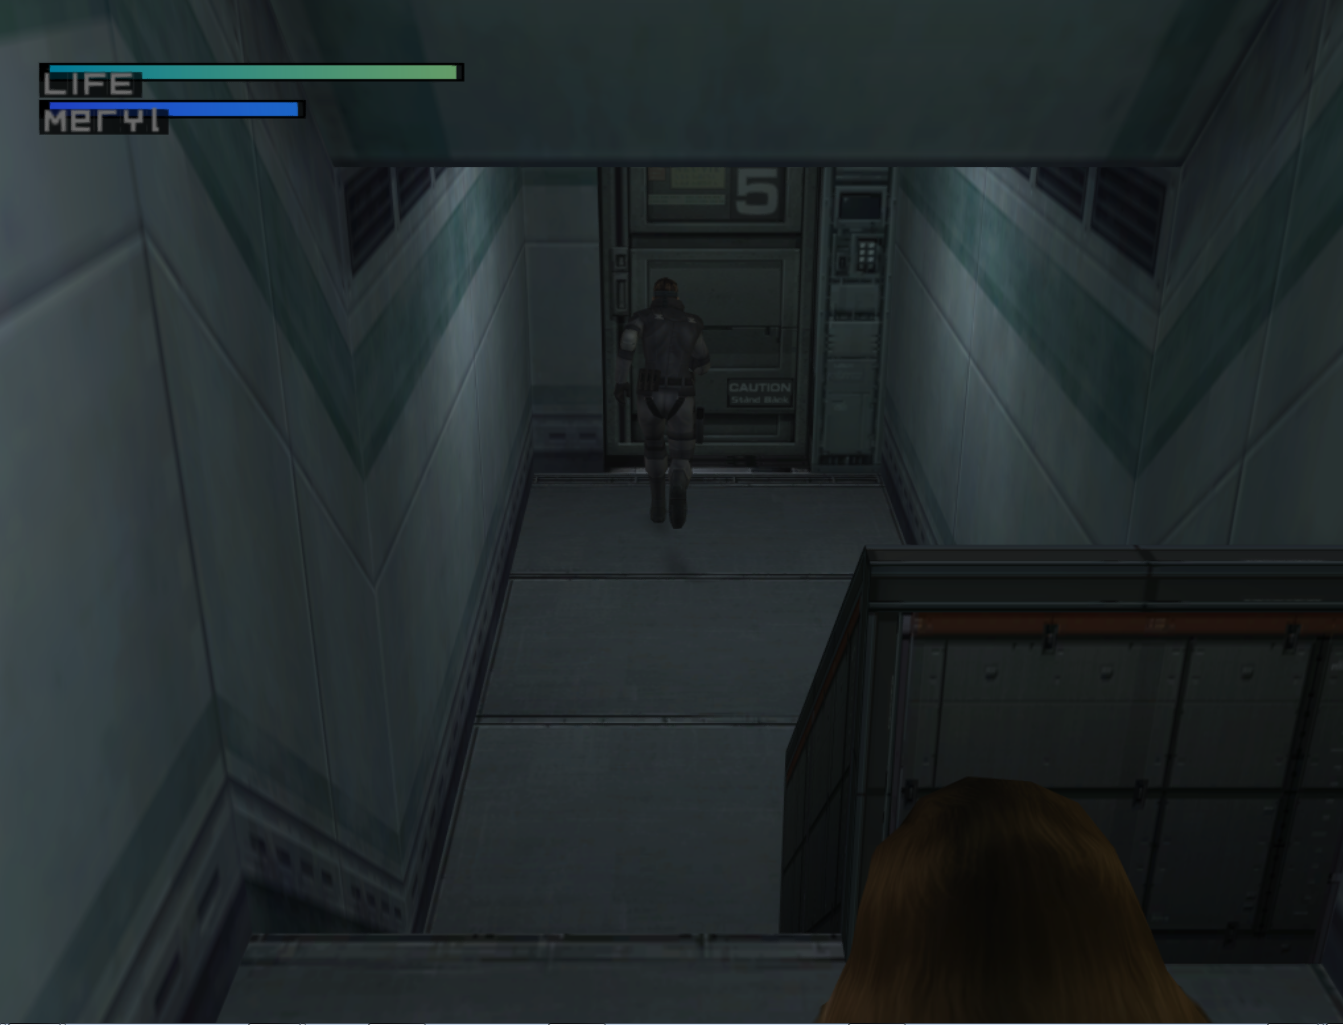
- Hold upright. Roll at the position shown in the screen shot. Run up to the wall, then go upleft towards the ridge in the middle of the Canyon. Be sure to roll as you approach the ridge.
- Stand just at the ridge, and look in first person. DO NOT SHOOT at the gunner when he stops the first time.
- The Tank can move down or right. While it is moving you can go for a head shot on the gunner.
- Headshotting the gunner is deceiving. Examine the iron sights in FPV.
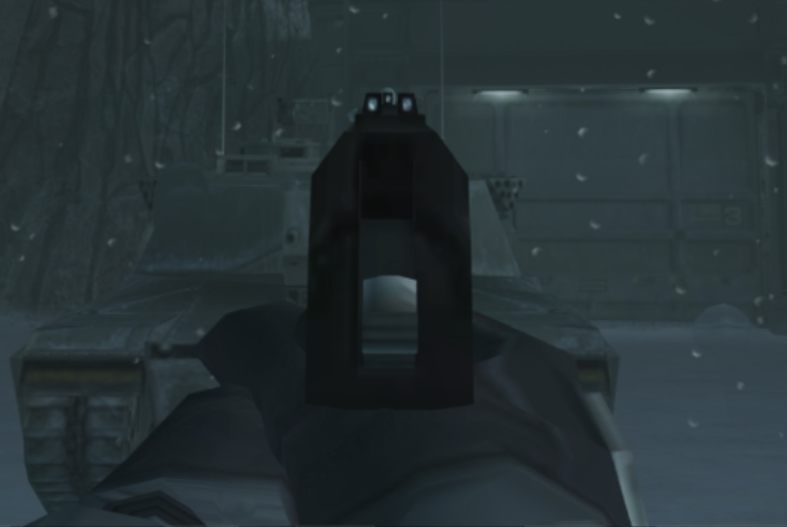
- Do not stare at the tank in FPV, or else the gunner will be shy and not pop out. Instead, mash B or Right Trigger to see when he pops out.
- Once the gunner pops back out, you want to get two headshots.
- If you are lazy, you can use the B button lockon to aim at the gunner in third person view. (I think you need to wait a moment or so while the gunner is readying up before TPV shot?) Be aware that headshots are not consistent in TPV.
- Be aware of the invincibility frames so that you time out your shots.
- After the killing the first gunner, aim in TPV. The second gunner will say “See how you like this!” Once you see the bullets flying in the air, spam the SOCOM to get a TPV headshot.
- I forget what causes this (maybe TPV?) but sometimes Gunner 2 will immediately go into the hole after “See how you like this!”
- If you didn't get a TPV headshot, you can only do one headshot the next time he pops out, then tanking the remaining damage. If you do two headshots, the Tank's pattern will be messed up.
- If you did get the TPV headshot, finish him off with two headshots.
Nuke Building 1F
- After the load, equip the chaff grenades, R ▼ or ▲ 2.
- Run to the top left corner at the door. Go against the wall, crouch, and hold downleft while mashing the right trigger.
- Once you get through the wall, stand up THEN let go of the wall.
- Throw your chaff as soon as possible, then run left along the middle line.
- If you are worried the chaff won't explode in time, brush into the guard.
- Be careful not to hit the ground, or you will activate the codec you are trying to skip.
- If you are fast enough, you can roll up the final set of stairs and not get shot by the guard. If you are barely fast enough, you will need to punch the guard after rolling up the stairs.
- Do not interact with the guard at the elevator, let him do his thing as you call for the elevator.
- Press down to go to B1.
Nuke Building B1
- Hold downright after opening the door to the offices, pick up the Nikita Launcher, and return to the elevator.
- Press down to go to B2.
Nuke Building B2
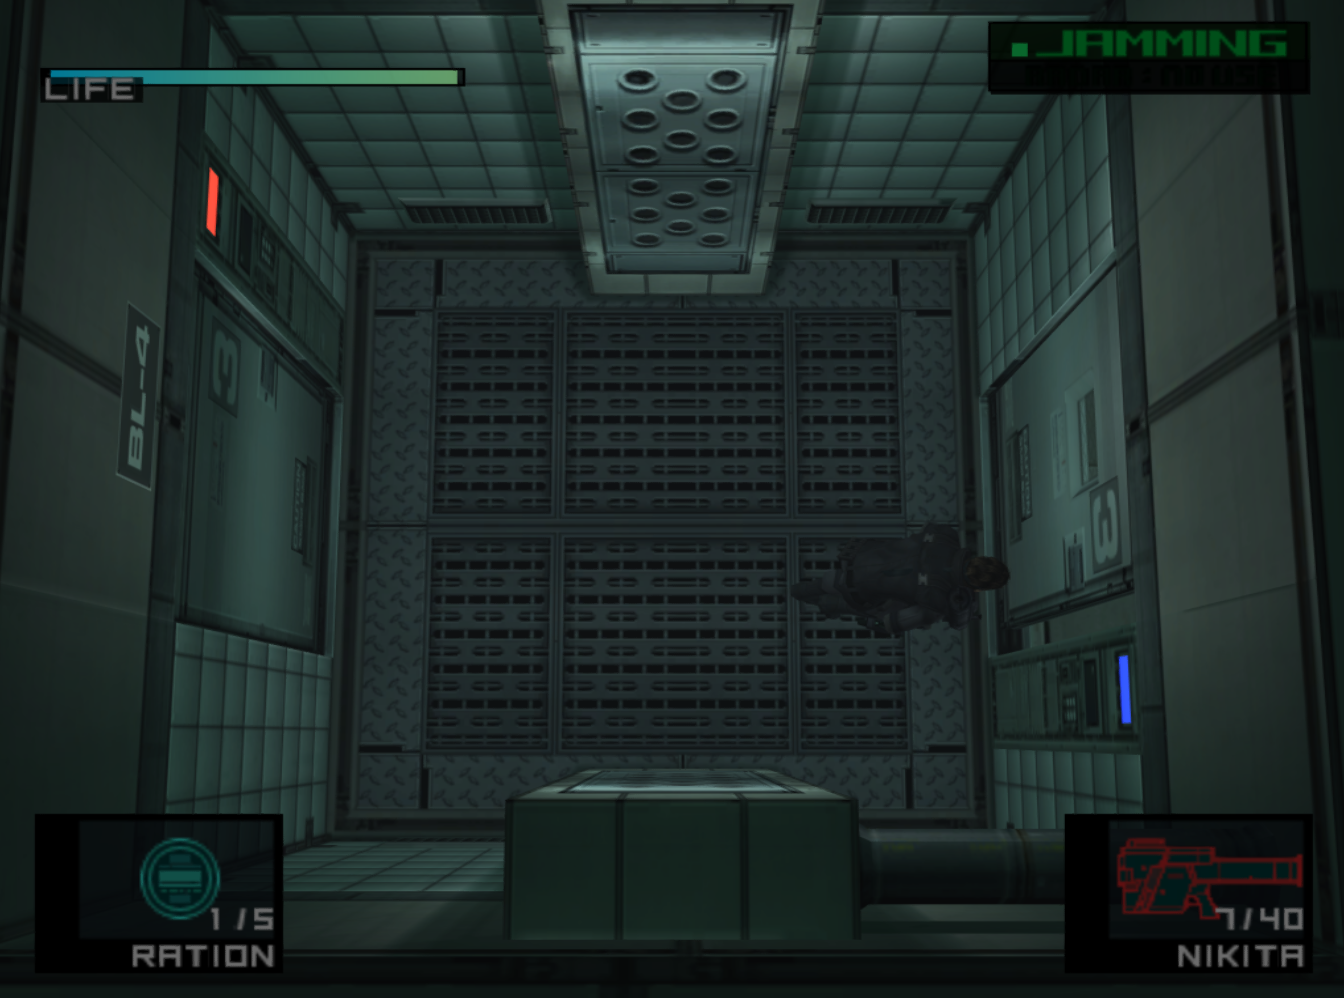
- Equip Nikita before exiting the elevator or after the generator cutscenes, Chaff Equipped, R ▼ 1 for nikita
- Hold Start+A after generator cutscene to open the codec immediately.
- After the Nikita missile turns the corner into the turret area, let the missile fly without adjustment, or else you risk the turrets shooting down the missile.
- Quick changing to Chaff Grenade just before the missile hits the generator saves frames.
- Unless you are going for RTA race strategies, throw away the remaining chaff grenade as you run towards the Laboratory door. Make sure to change back to Nikita.
- You can save a frame by doing a frame perfect roll as you go through the Lab door, but if you are early you lose over a second. Don't bother rolling through this door.

- You can save up to 12 frames rolling through the filtration room. Roll once the door begins to open, notice the blue light.
- After the bloody hallway cutscene, hold upleft on dpad. Roll towards the door once Snake fully rotates to the door.
Ninja
- Ninja has 255 HP across all difficulties
| Attack | Damage |
|---|---|
| No Weapon Punch | 3 |
| No Weapon Kick | 6? |
| Socom Punch | 6 |
| Socom Kick | 6 |
| Nikita Kick/Roll/Smack | 18 |
- Hold right trigger after skipping the cutscene to immediately equip SOCOM R ▲ 1, ◄ or ► 1.
- Move as close to the Ninja as possible without bumping into him. Do a Punch, Punch Nikita (PPN) combo. This can be done by swapping to Nikita before the kick lands.
- After the Ninja jumps away, hold A and B to run and gun. Approach the ninja, shoot the SOCOM, and do one of two things after he deflects the bullet.
- Punch Punch with the SOCOM out (SPP, SOCOM PUNCH PUNCH)
- Punch, then roll into the ninja, making sure to swap to Nikita before making contact with the Ninja (SPNR, SOCOM PUNCH NIKITA ROLL)
- Repeat this process until the Ninja's health is low enough to be finished in Phase 2 - Optimally 4 SPNRS
- Try to finish the fight with the Nikita out if possible.
Lab Exit
- If you didn't pick up the Chaff grenades in the bottom left corner of the Lab during the fight, do so during the exit.
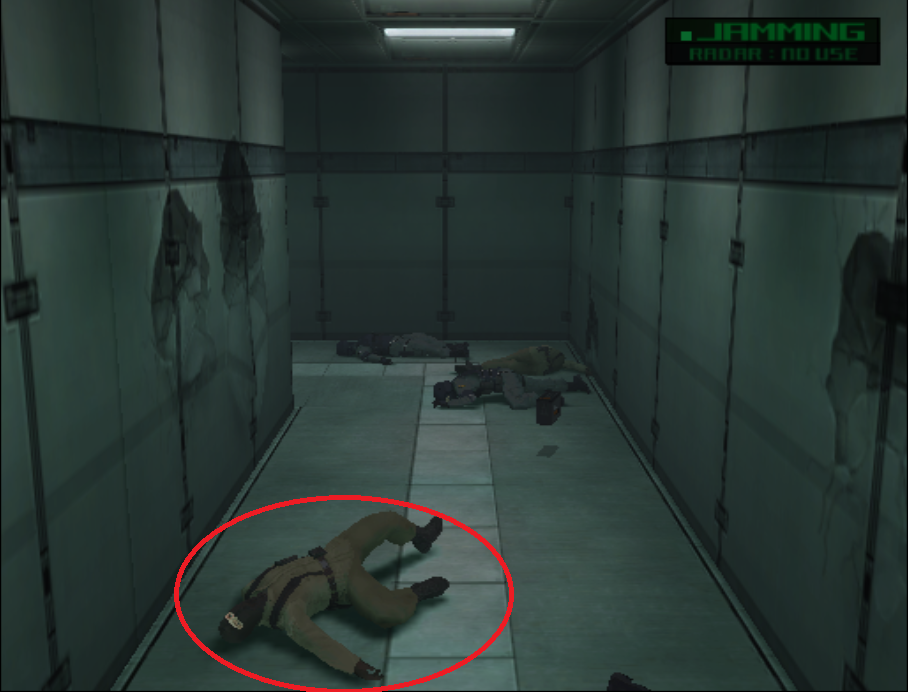
- Roll past the corpse on the ground, or else Snake will walk on the body. Rolling over the guard saves up to 30 frames.
- Rolling back to the gas hallway can save up to 11 frames. If you roll too early, you will lose over a second. If you roll any later in the 10 frame window, you will lose frames. Roll once Snake is at the door frame.
- The second room on the right as you exit contains stun grenades. You may pick these up if you wish to use stuns during the Tower A climb in Disc 2.
- After you call the elevator, press up to go to B1.
Nuke Building B1
- After entering the office, go against the wall and knock to attract Meryl's attention. Run downleft to get her to spot Snake.
- Run towards the women's bathroom, be careful not to bump Meryl as she runs into the restroom. Be in front of the restroom to activate the cutscene immediately.
- After the cutscenes, turn the corner by the elevator to go towards the Commander's Room.
Commander's Room
- After running forward to activate the cutscene, roll through Meryl to save frames on the entrance.
- The fastest way to knock Meryl out is to knock her out with the Nikita.
Psycho Mantis
- Mantis has 96 HP and Stamina across all difficulties.
- To do the Meryl phase skip, you must get him down to 46 Stamina, then do a critical shot. This must equal to 50 damage.
| Attack | Damage |
|---|---|
| Head/Right Leg Shot (Critical) | 12 |
| Body Shot/Nikita Smach | 4 |
| Roll | 3 |
| Punch (with or without gun) | 2 |
- 4 critical shots and 1 punch (12 + 12 + 12 + 12 +2 = 50)
- 2 body shots, 3 punches, 3 critical shots (4 + 4 + 2 + 2 + 2 + 12 + 12 + 12 = 50)
- There is a chance when dealing damage to Mantis that a 'phantom' psycho blast will hit you. In other words, Snake will take damage seemingly for no reason.
- Mantis can randomly say extra lines of dialog during the fight's cutscenes.
- Plywood normal non-lethal (no phase skip): 57 secs
- Lethal Normal (fastest seen): 54 secs
- Plywood Easy Couch (w/socom start): 53-54 secs
- Blue's Peanutbutter cups: 53-54 secs
- Wallguy's Hard Couch (w/crit shot start): 50.666 secs
Phase One
- If you have two controllers connected into Port 1 and Port 4, press Z a few times on the Port 1 controller before the blackout.
- Switch to Port 4 during blackout, and hold Z, right trigger and A.
- If you want to use M9 for Mantis, R ◄ or ► 1 after Hideo Blackout
Meryl Possessions
- Meryl can be possessed, hold left trigger, right trigger, Z, and A during the cutscene. Drag your aim to Mantis's head.
- After she gets possessed a second time, hold left trigger, right trigger, Z, and A during the cutscene. A quick tap up will connect the headshot with Mantis.
Final Phase
- After Mantis whines, hold Z to go into FPV. Aim for his right leg (Snake's left) and shoot.
- Finally, connect one more shot in his leg, either as he is flying to the middle of the room or when he ends his flight.
- Hold Start+A when Mantis falls to the floor to open the codec immediately.
- Below is a nonlethal method, which is about the same speed and skips the Meryl possession
- Below is a nonlethal method, which is easier, a little bit slower, and doesn't skip the Meryl possession
Exit
- Roll once you reach the edge of the stairs. You lose about 20 frames not rolling down the stairs.

- Roll through the door to the Caves. Safest thing to do is to wait until you see the door opening to roll. You can save up to ~8 frames rolling through the door.

- Watch for the gap in the door.
- TAS Variant where you roll before the door has visibly opened. This is risky, as you can lose over a second by rolling too early.
Caves
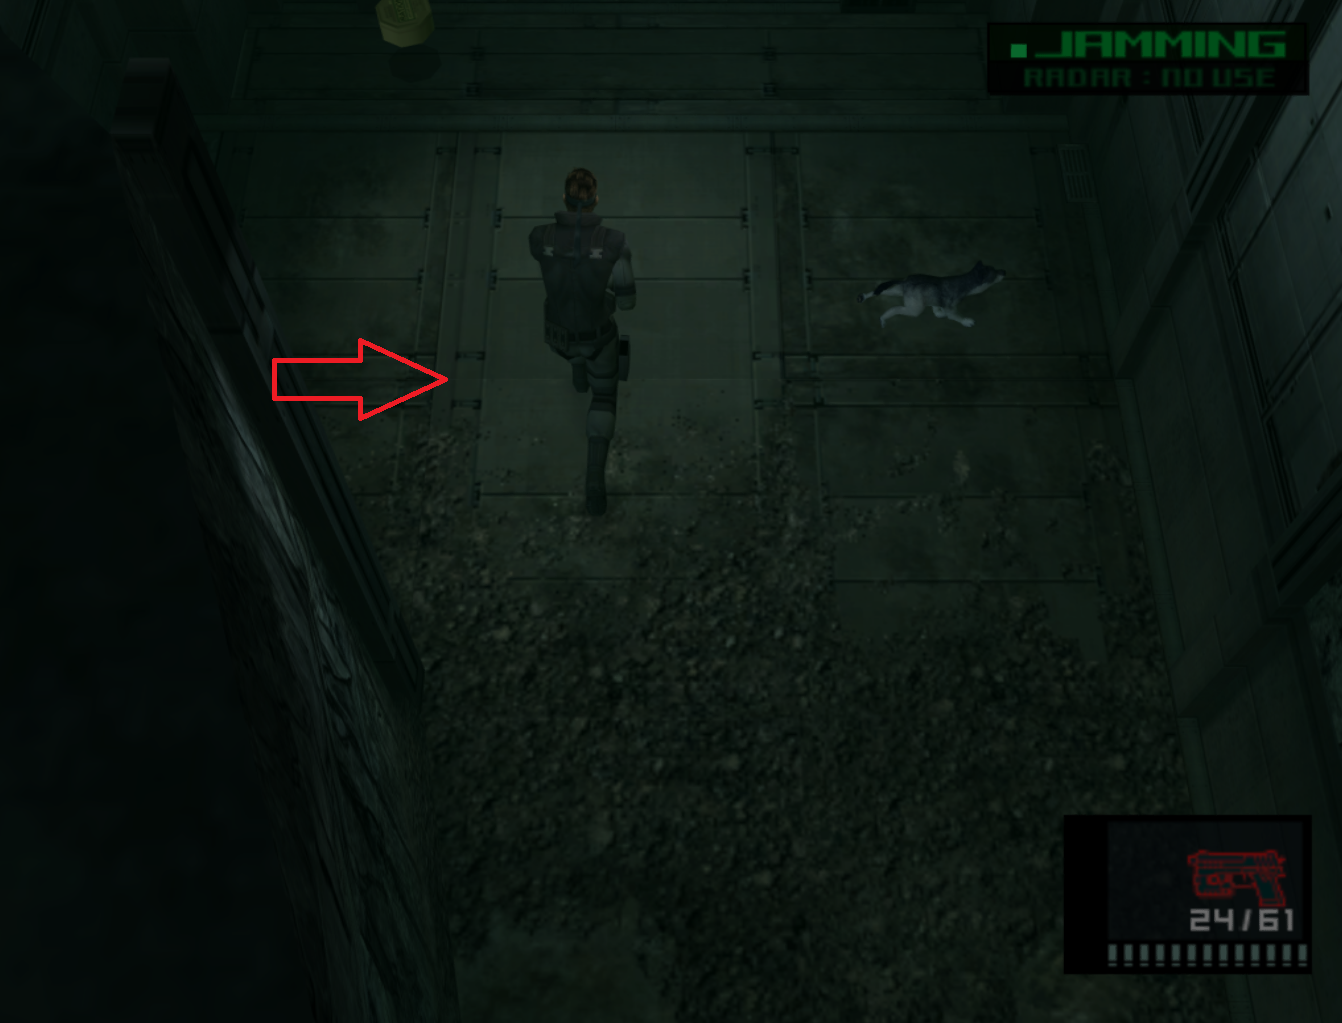
- Hold upright on the dpad3), then upleft towards the overhang. Roll into the overhang.
- Dogs are extremely dangerous. If they dive Snake, their attack has PRIORITY over a Snake roll. This attack will knock Snake down.
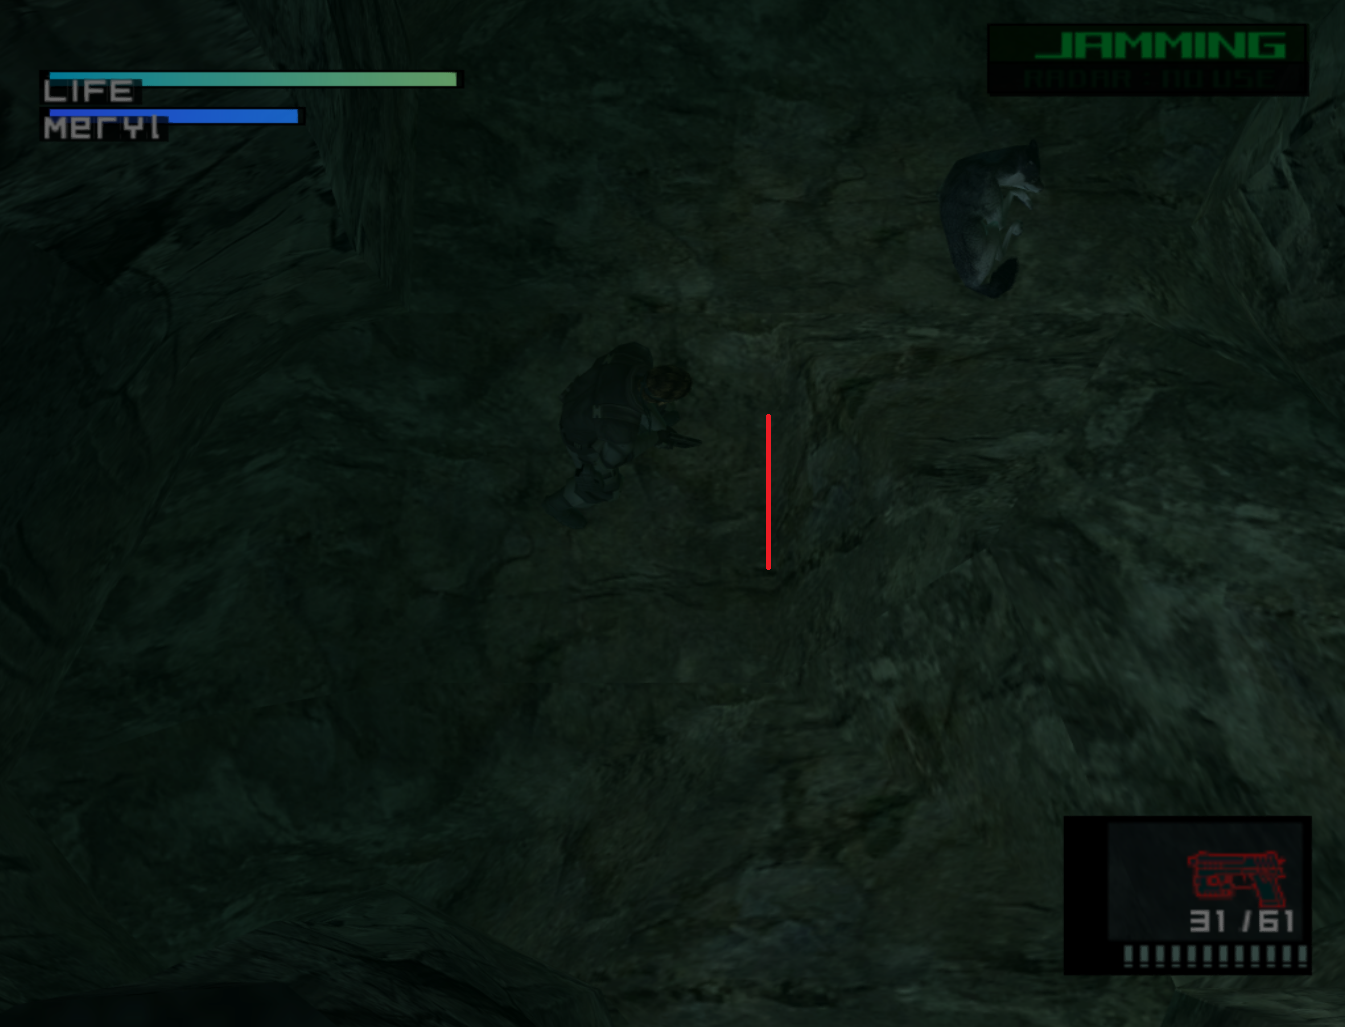
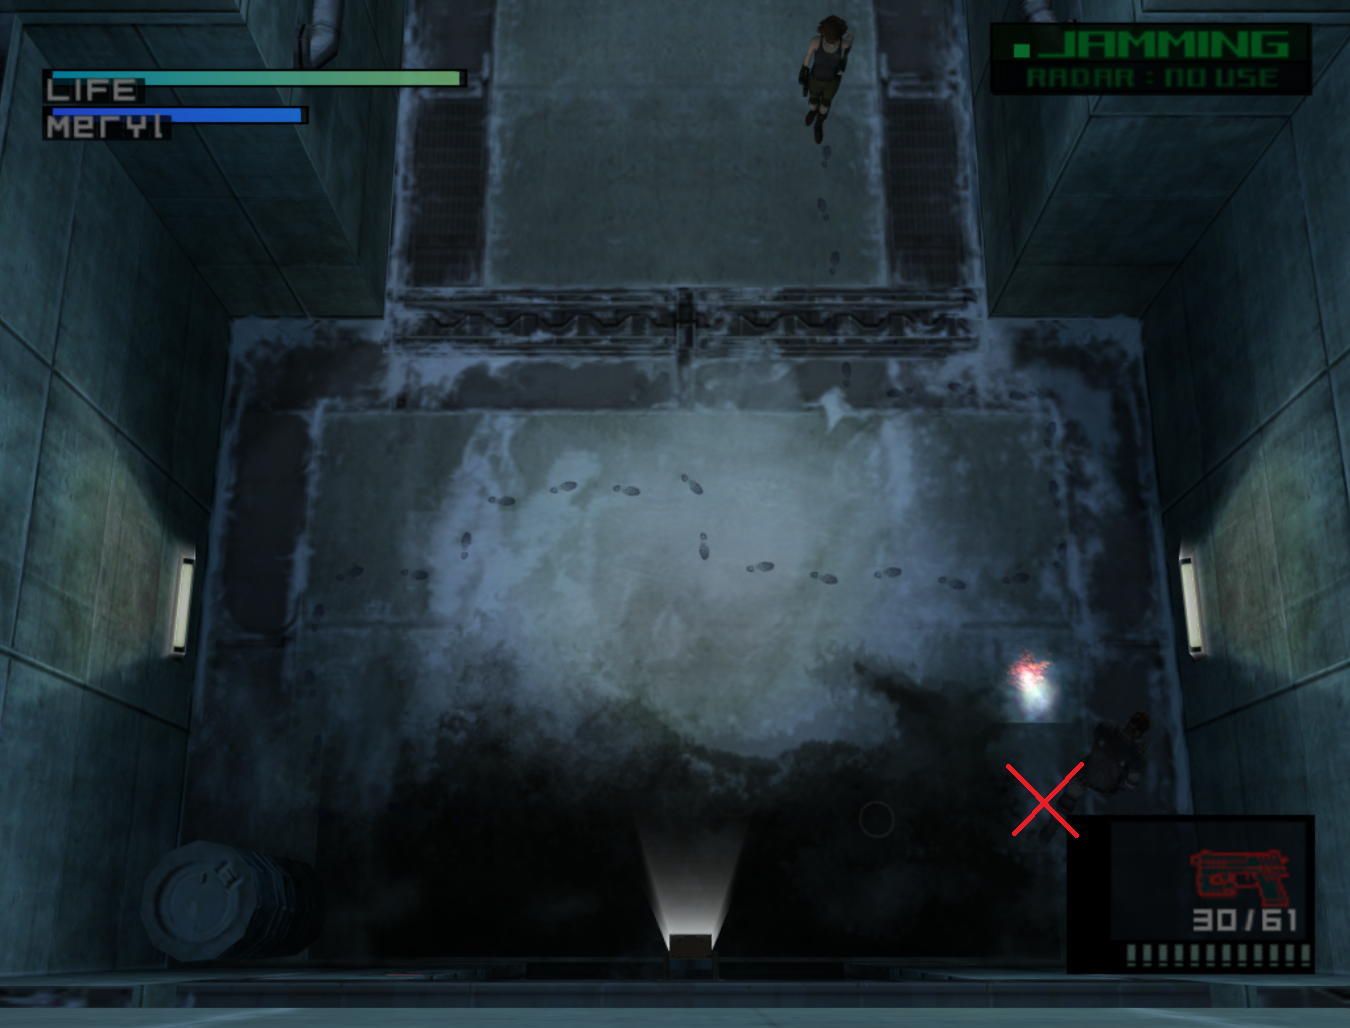
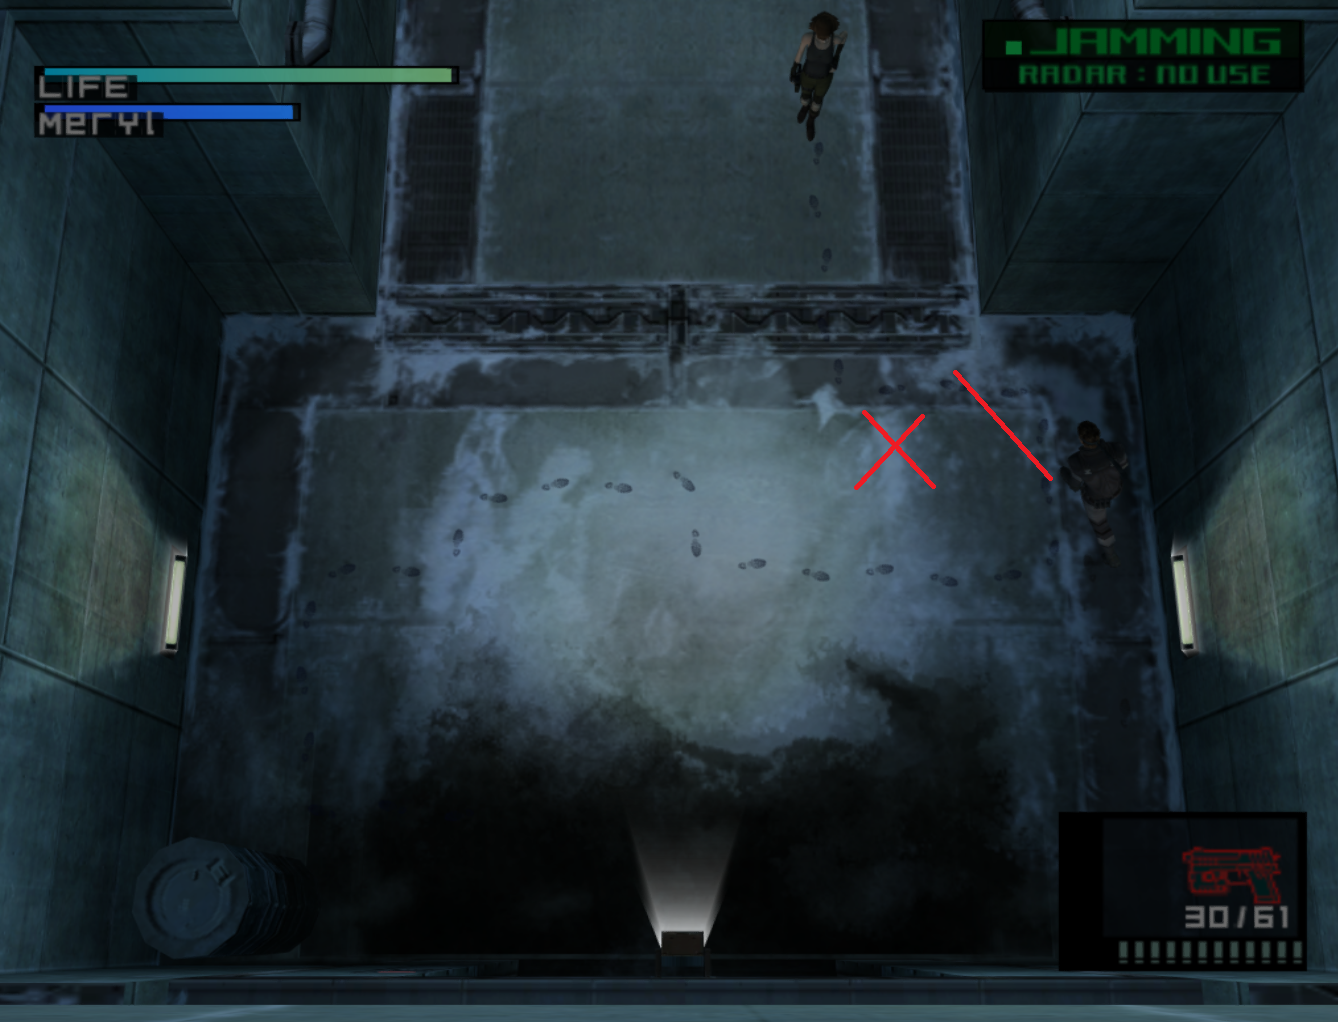
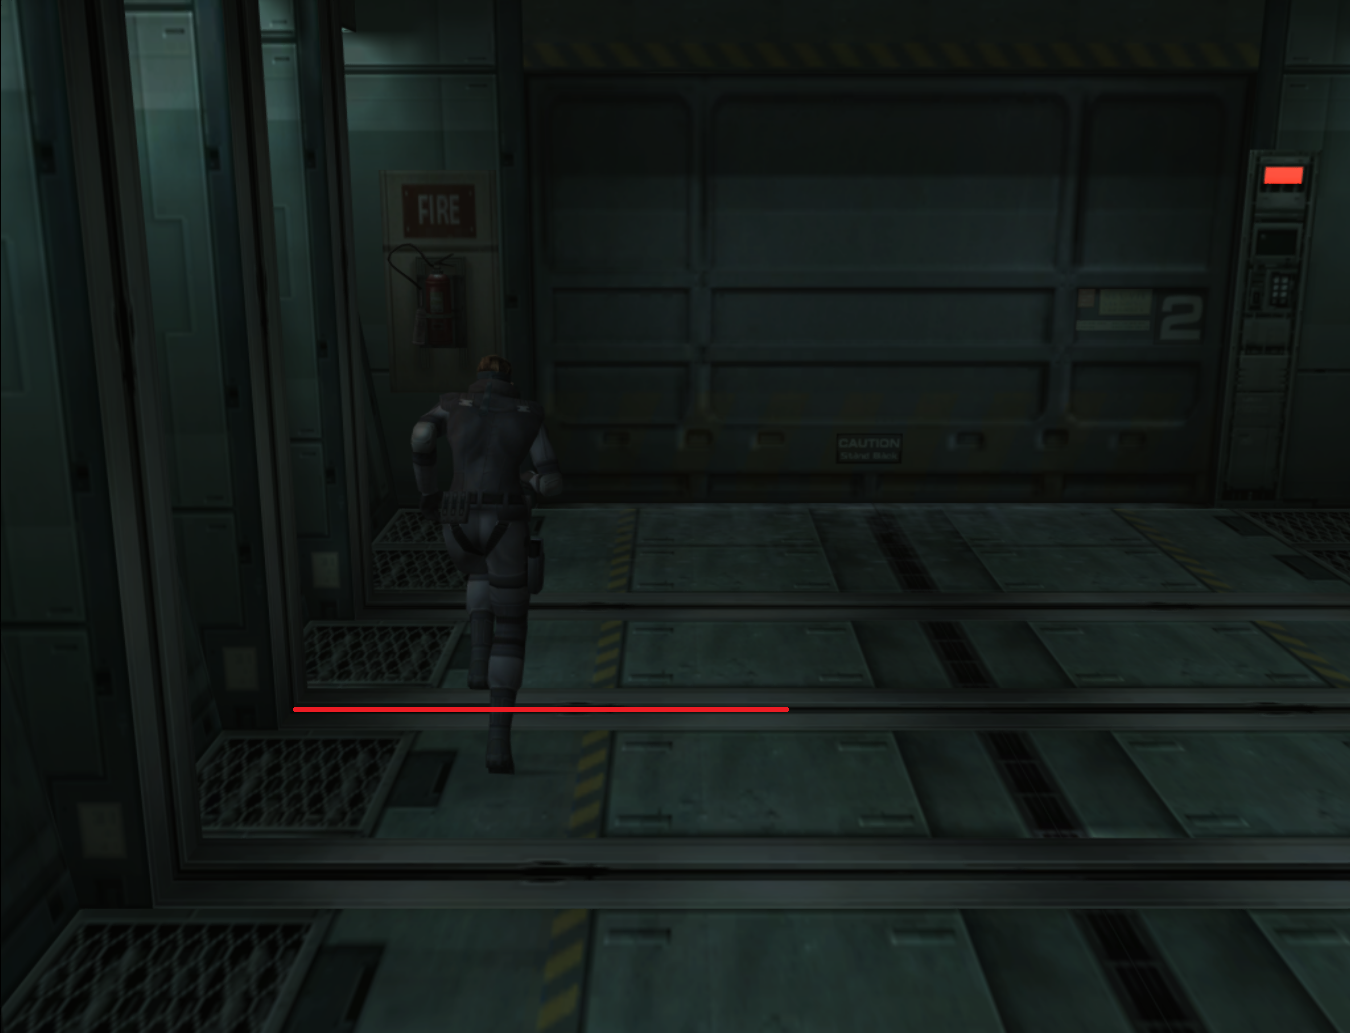
- Roll once you cross the red line.
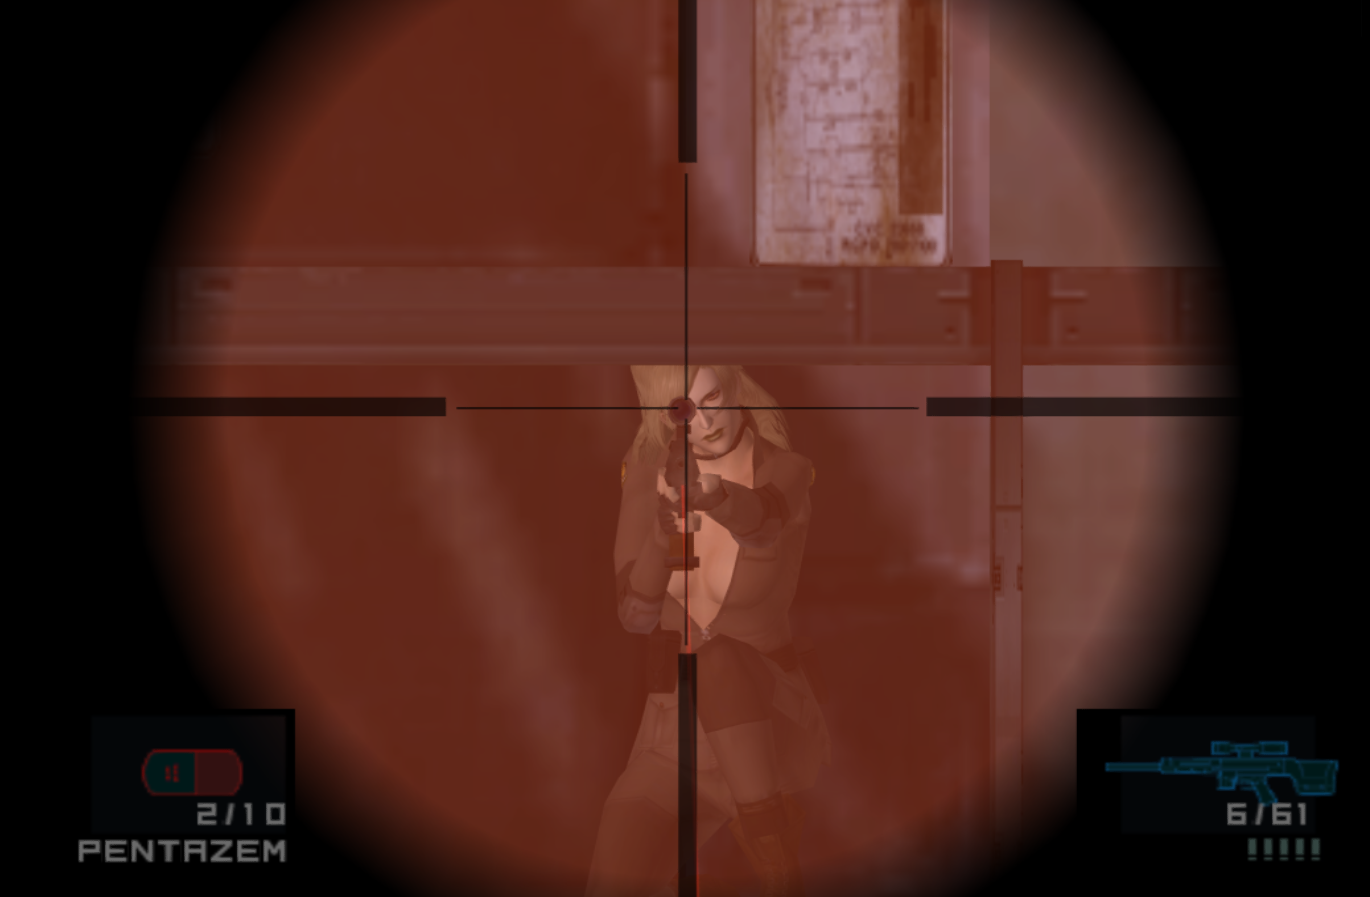
Meryl Dialog Skip
- Meryl's dog dialog loses four seconds.
- Shoot at her with a pistol between the green and red lines.
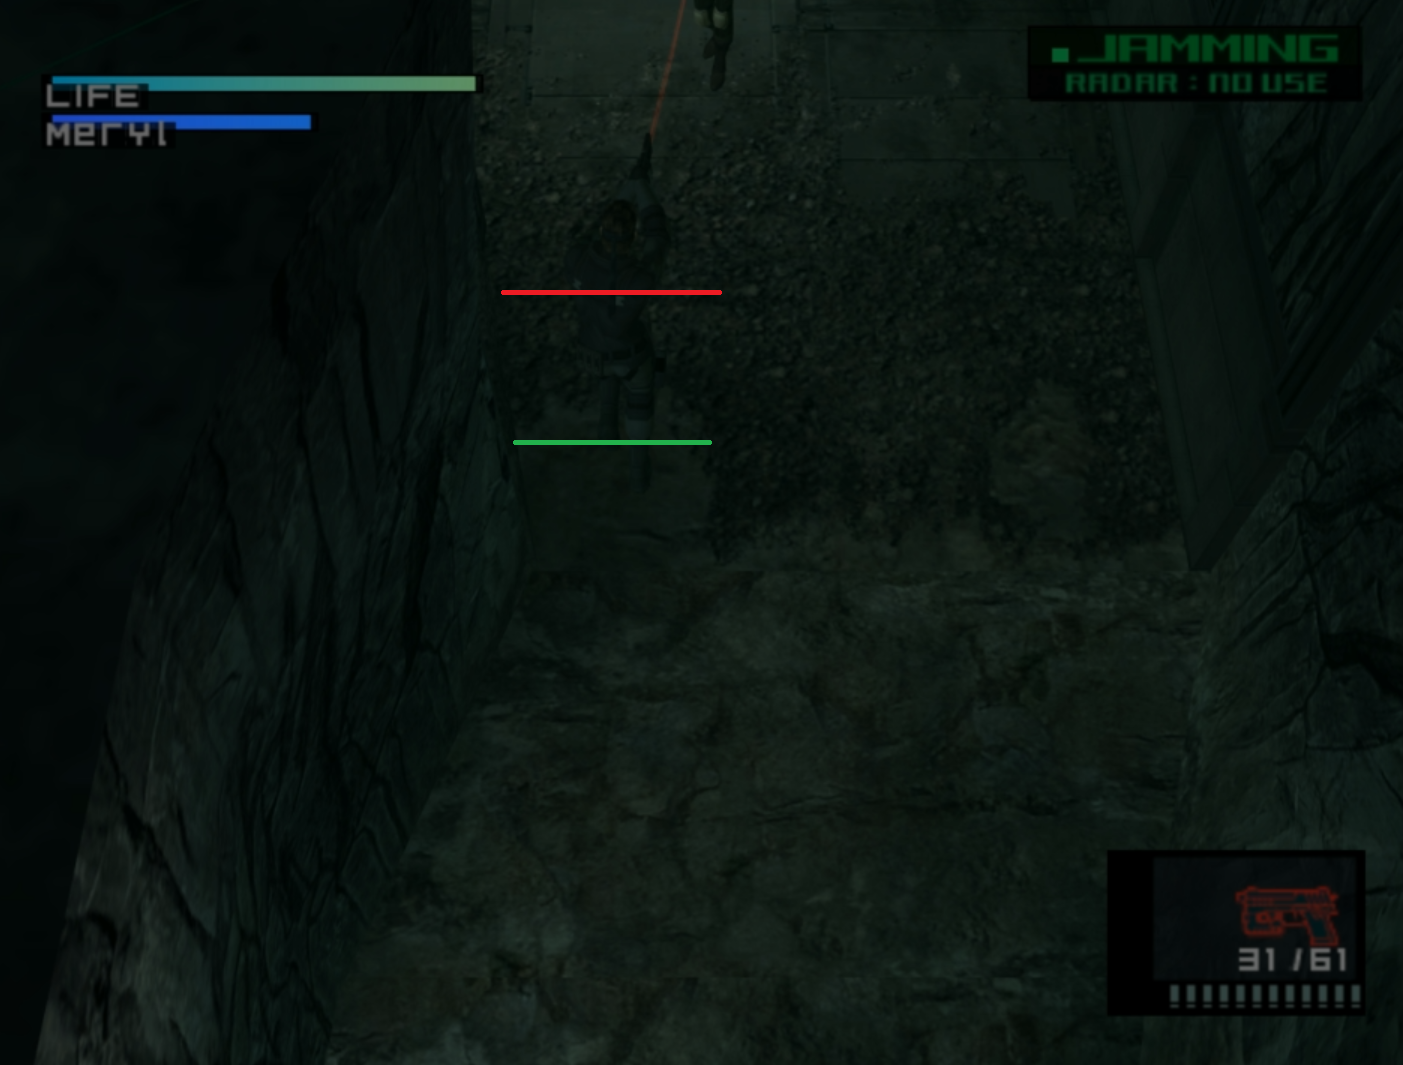
- If you cross the red line without Meryl in stun, you will get the dialog. You can shoot earlier than the green line, but it is slower. Watch the video below for examples.
- You can shoot multiple times and just bump into Meryl instead, rather than rolling.
- If you roll too late, Meryl can slap you down, forcing you to hear “What are you thinking?” Try to get up as soon as possible if she slaps you, as you may be able to get to through the door before her dog dialog.
- Sometimes, Snake will aim at the wolf pup rather than Meryl. You can either take your chances and hope Snake changes his aim, or FPV Meryl instead.
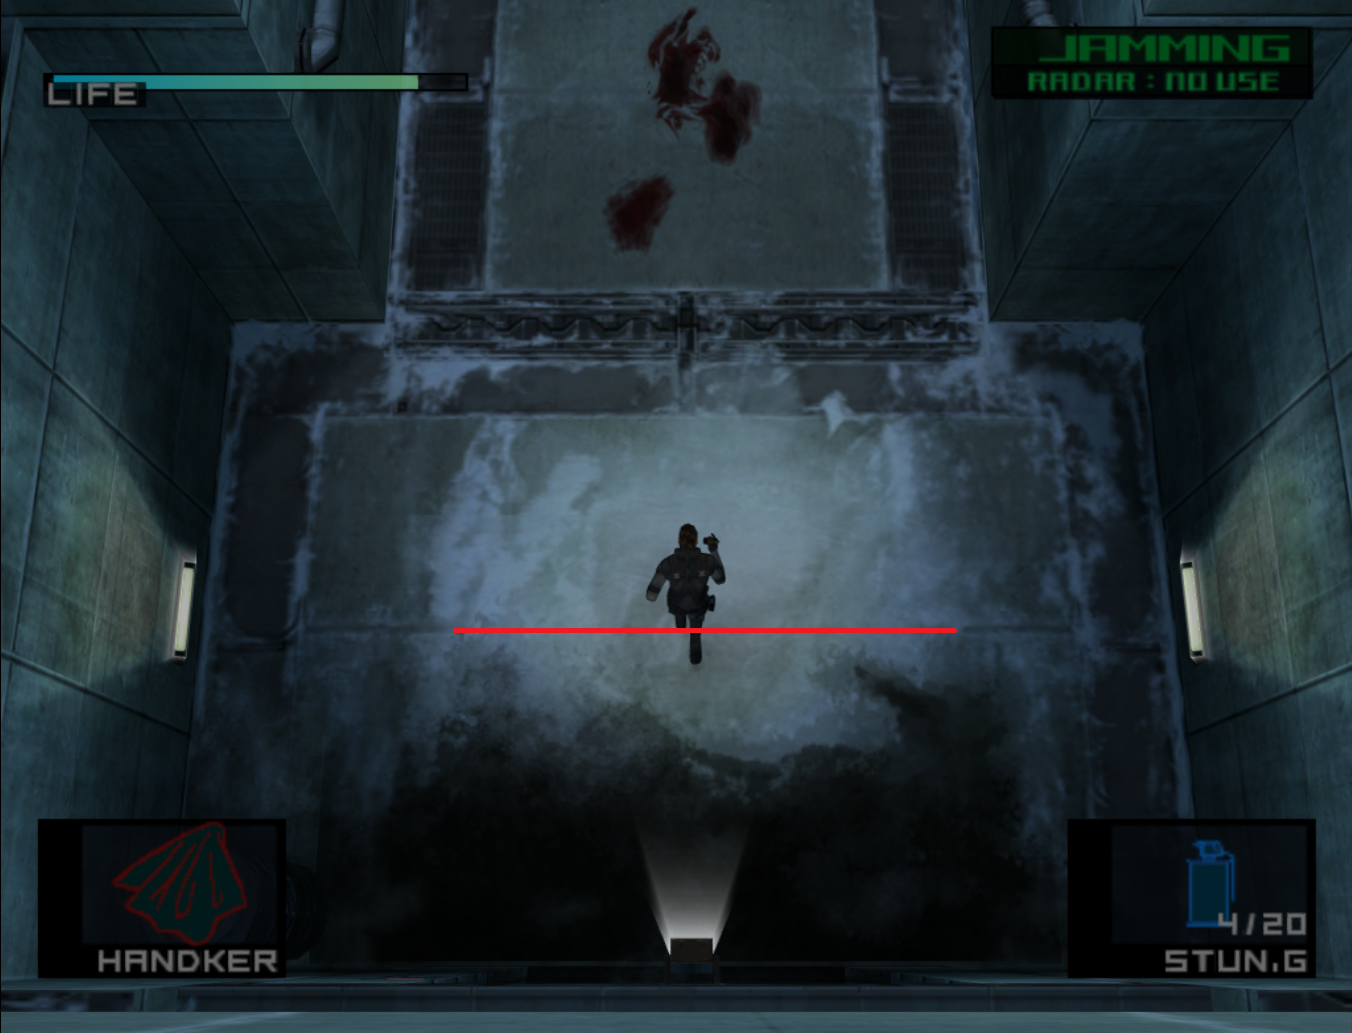
Underground Passage
- If you trip a mine, you will lose about 12 seconds. You can trip a mine without taking damage, however you will still lose time from Meryl's cheeky behavior.

- After skipping Meryl's cutscene, go right. Be careful not to trip the mine in the bottom right corner by turning too early.
- Roll upleft at the top right corner. Be careful not to trip the mine by turning too early.
- Press downright on dpad to turn to the wall. Go left when Snake crosses the weapon's box in the GUI. You can roll into the Caves to save ~8 to 11 frames.

PSG1-T Backtrack
- Do a couple of Socom shots, you can do a single shot but this rarely (1/20?) doesn't get noticed by the dogs. Hedge your bets with 2-3 shots.
- Bump into the wall from downright, then downleft roll in the crawlspace.
- Puppy will come to investigate OR the big dog will sit by the crawlspace.
- Dog will howl once alerted.
- Run along the top to shoot or roll through the second dog.
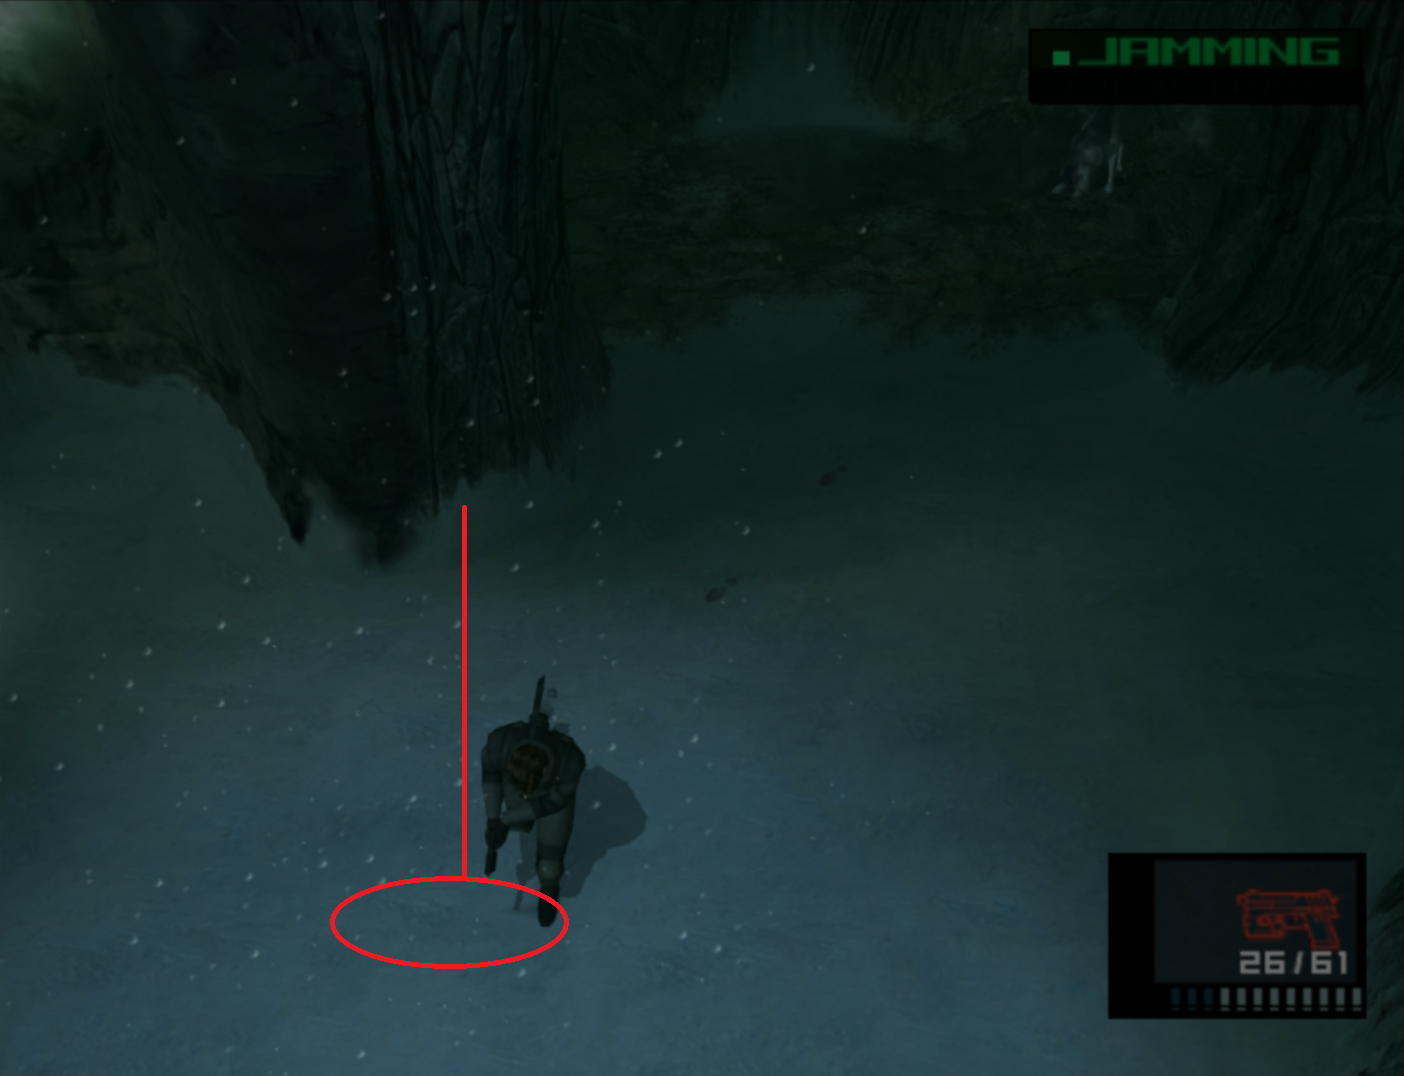
- Roll at a certain line in the snow in the open area.
- Rolling through the commander's room door is free, it saves ~20 frames compared to running in.
- Rolling into Nuke Building B1 can save up to 9 frames. Roll once you get past the lines in the walls.

- Retrieve the PSG1-T, ammo, and pentaz in the bottom left corner of the offices.
- Rolling into the Commander's room can save up to 5 frames. There is about an 11 frame window to do so. Wait until you see the door are opening. This is the most difficult frame saver of the segment.

- As you enter the Commander Room, hold right on dpad to move straight. Change to holding up once the camera changes. This saves frames.
- Roll at this line to save the most frames. Rolling a step earlier or later will lose about 10 frames. Not rolling at all loses 23.
Wolf 1
- L ▲ 1 for Pentaz, use 1-3 (the effects stack)
- R ▼ 1 for PGS1-T from M9/Socom
- The most consistent approach is aiming just below the railing along Tower A.
- If Wolf is hiding, take the opportunity to pick up PSG1-T ammo and/or move as far forward as possible.
- Once you have delivered the final shot, immediately change back to the pistol and run forward.
- Three seconds after the final shot, roll, change to PSG1-T mid roll, R ▼ 1 for Chaff.
- While rolling into the cutscene trigger, quick change to the PSG1-T. This sets up the inventory as you exit the Medical Room.
Medical Room (Torture Cell)
As Johnny does his patrol, he sneezes at certain points in his route.
- Johnny responding to Snake making noise - “Hey.” and “Shut up in there will ya?” is faster than him sneezing.
- A common misconception is that you need to call Otacon for him to bring supplies. This is not correct, he will show up either way.
- You do not need to be in front of the door for the Otacon cutscene to start, unlike the original game.
Prison Skip
There are two optimal ways to exit the Medical Room. These methods break the story flags to save time later on.
Easy Prison Skip
*Tap left so Snake is not so close to the door. Go prone. L ▼ 2 for Ketchup, Use ketchup, L ▼ 2 for Handkerchief
- DO NOT STAND UP UNTIL YOU HEAR THE DOOR CLICK!
- Run upright pass Johnny to make him move fast.
- Get into the torture room, then throw Johnny by the cutscene trigger.
- Don't delay, get out the door! If you hear Johnny hit the ground, you were too slow
- Roll towards the door, get interrupted by turret, this prevents you from getting shot twice
- You'll know you have succeeded if Snake exits with his clothes on, and there are no turrets.
- Hold left then upleft to return to the Torture Room
- Hold down then upleft, roll into equipment
- Be aware that the hitbox for the equipment is deceiving and not that big.
- Roll towards the door to avoid getting shot twice
Bonk Prison Skip
Dpad Input is required. Bonking into Johnny with the analogue stick is slower and won't let you perform the skip this way.
Example by Tyler2022 with GameInputViewer https://youtu.be/3Rrk3rxd6uE?t=1505
Example by BlueMetal
Triple Bonk Example by Hau5test
Hard Prison Skip
- If you are a beginner, do not go for Hard Prison Skip.
Returning to Underground Passage
- Quick change to Chaff grenade
- Call the elevator, go up for the Tank Hangar.
- Roll into the door to the Canyon, at the penultimate sensor line. This saves up to 26 frames over running forward.
- Hug the top left rock so the guard notices you. Run to the left of the exposed metal line.
- If you have stun grenades, you do not necessarily need the grenades. If you don't, pick them up before rolling into the door.
- Repeat the movements for the rooms up to the Underground Passage.
- R ► 1 for Stuns OR R ► 1 for Grenades at some point during a roll after 1F.
- If you do not do Prison Skip, roll at the middle line to save up to 20 frames.
Disc Swap
- In Game Timer is ticking during the Disc Swap.
- Gamecube's disc swap is faster than Wii, due to the popup disc cover.
- Prep Disc 2 before entering Tower A.
- Don't pop the disc cover/eject Disc 1 too early, or you will get a prompt to re-insert Disc 1. IGT does not tick while this prompt is up.